The Frustrating Reality of Bad AI Art
You sit down at your computer, completely excited to create a stunning piece of digital art. You type your brilliant idea into the text box and hit the generate button with high hopes. But instead of a masterpiece, the machine spits out a distorted, weirdly shaped image with missing details and terrifying hands.
I still remember my very first attempt at making AI art. I needed a simple header for my blog, but after spending three hours and nearly all my daily credits, I was left with a folder full of weird mutants with extra fingers and melted faces. I honestly felt so dumb, wondering if everyone else had some secret technical skill that I completely lacked.
I know exactly how this feels, and it is incredibly discouraging. According to a recent technology report by Forbes on artificial intelligence trends, learning how to communicate with these smart machines is becoming a necessary daily skill. You spend hours tweaking your words, burning through your daily credits, and still end up with something you cannot use for your project.
Just like how bad video editing is secretly killing your youtube money and how to fix it, poorly written text commands will secretly ruin your final output and waste your valuable time.
Many ordinary users simply cannot find the right solution because the internet is filled with confusing advice. Here is why the wrong information leaves people stuck and frustrated:
- Copy-pasting blind formulas: People copy huge blocks of text from others without understanding what the individual words actually do.
- Overloading the machine: Many users think adding more adjectives makes the picture better, which only confuses the system.
- Ignoring the core subject: Vague descriptions force the computer to guess your intentions, leading to completely random and bizarre results.
- Following outdated guides: The software updates constantly, meaning last month's secret trick might completely ruin your picture today.
This constant cycle of failure does not just waste time; it slowly destroys your creative confidence. When you cannot get the tool to do what you want, you start doubting your own abilities.
- You feel left behind: Watching others post perfect digital art makes you feel like you are missing some secret technical gene.
- Your projects get delayed: If you need a graphic for work, spending four hours fighting with an app completely destroys your productivity.
- You give up too soon: Many people cancel their subscriptions and walk away, thinking the technology is just an overrated gimmick.
- The invisible stress: Staring at a blank screen while trying to guess the "magic password" creates unnecessary daily anxiety.
Imagine needing a simple banner for your website and ending up with a headache instead. You are not alone in this struggle. The problem is not your imagination; the problem is simply the way you are speaking to the machine.
Machines do not understand human emotion, poetry, or subtle hints. They only understand structured data, clear subjects, and specific modifiers. Once you learn their language, everything changes.
The Core Formula for Perfect Image Generation
We are going to fix this problem right now with a highly practical, scientific approach to talking to these platforms. Think of the software like a highly advanced camera. You need very specific instructions, much like master your photography drone calibration tips to avoid costly repairs, to get the precise angle, focus, and lighting you want.
Let us break down the exact steps you can apply today to start getting breathtaking results.
If you are a visual learner, watch this quick video where I show exactly how changing just a few simple words completely transforms the final image. Check it out below, and then keep reading to learn the step-by-step formula I use to get these results!
Step 1: Start with a Crystal Clear Subject Definition
The very first thing you must do is clearly identify your main subject. This is the foundation of your entire request. Research from MIT Technology Review on artificial intelligence emphasizes that these models rely heavily on the very first few words you type.
If you start with vague background details, the system gets confused about what is most important. Always put your main character, object, or central focus at the very beginning of your sentence.
Bad Example: "A beautiful sunny day in a magical forest with tall trees and somewhere in the middle there is a tiny cute puppy."
Good Example: "A cute golden retriever puppy, sitting in a magical forest, beautiful sunny day."
Notice how the good example tells the machine exactly what the star of the show is immediately. The system prioritizes words from left to right. By placing the puppy first, you guarantee that the dog will be the central focus of the final picture.
You must also be specific about the subject's details. Instead of saying "a man," say "an elderly man with a white beard wearing a red jacket." This removes the guesswork for the software.
Step 2: Define the Exact Environment and Lighting
Once your subject is locked in, you need to place them in a specific world. A subject floating in a blank space usually looks fake and unappealing. You must describe the background and the lighting conditions with extreme precision.
Lighting is the secret ingredient that makes digital art look professional. Without lighting keywords, the software will choose a flat, boring default light. You need to take control of the atmosphere.
Think about real-world photography rules. If you want a moody, dramatic picture, you need to ask for it. Managing your creative keywords can feel overwhelming at first, almost like organizing your paperwork.
But once you develop a clear system, it becomes as simple as the stress-free tax system organize your financial documents like a pro. You just pull the right keyword from your mental folder and apply it.
Try using these specific lighting phrases:
- Cinematic lighting: Creates a movie-like, highly polished look with deep shadows and bright highlights.
- Golden hour: Gives everything a warm, glowing, beautiful orange tint, perfect for nature and portraits.
- Studio lighting: Ideal for product shots or clean portraits, providing bright, even illumination.
- Neon cyberpunk lighting: Injects bright pinks, blues, and purples into dark, futuristic scenes.
By combining your clear subject with specific lighting, you instantly upgrade your output from amateur to expert. "A golden retriever puppy sitting in a magical forest, cinematic lighting, sunbeams breaking through the trees" gives you a dramatically better result.
Step 3: Choose the Right Artistic Medium and Style
The final core step is telling the machine how you want the image rendered. Do you want it to look like a photograph, an oil painting, a pencil sketch, or a 3D cartoon? If you do not specify a medium, the system will just guess, and the result will usually look like generic internet clipart.
You need to command the specific artistic style at the end of your sentence. This acts as the final wrapper for your idea.
If you want realism, use photography terms. Add phrases like "shot on 35mm lens," "photorealistic," "8k resolution," or "highly detailed." This forces the system to look at its database of high-end photography rather than digital paintings.
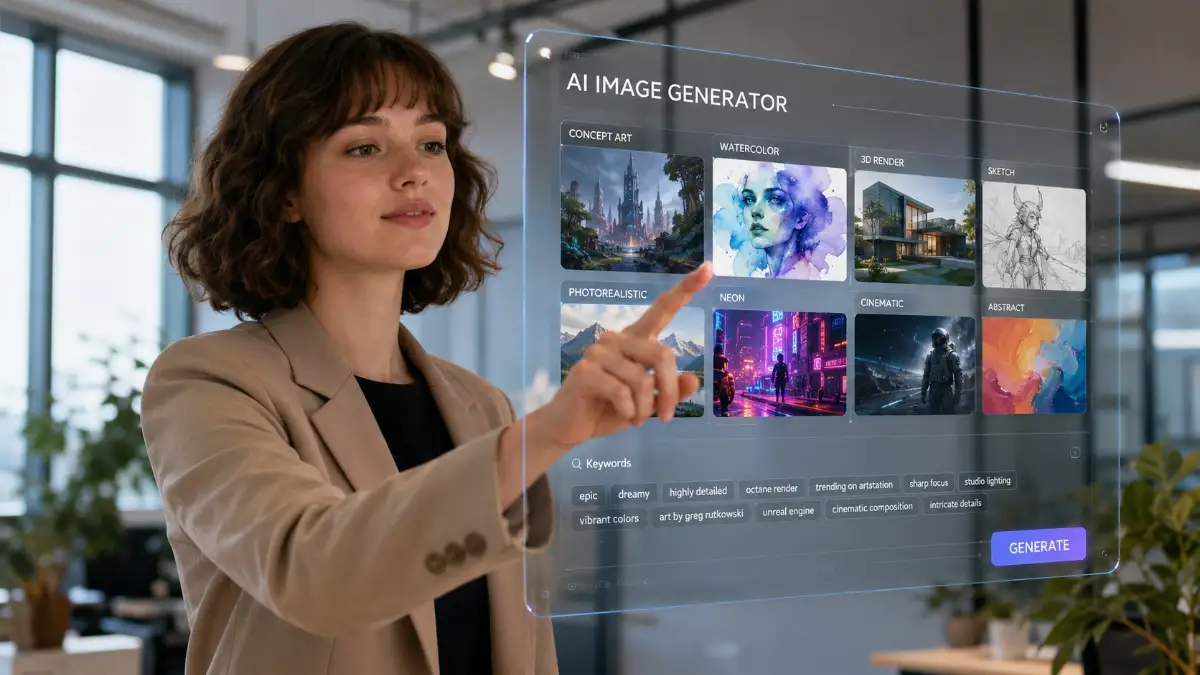
If you want an illustration, name the exact style. Use phrases like "watercolor painting," "comic book style," "vintage poster," or "vector art." You can even reference specific historical art movements, like "impressionist painting" or "pop art."
Let us look at the evolution of our formula:
- Subject only: "A golden retriever puppy." (Boring)
- Plus environment: "A golden retriever puppy sitting in a magical forest, cinematic lighting." (Better)
- Plus medium: "A golden retriever puppy sitting in a magical forest, cinematic lighting, highly detailed photorealistic, shot on 35mm lens, 8k." (Perfect)
This logical, three-part structure—Subject, Environment, Medium—is the foolproof scientific method for consistent success. You no longer have to guess. You just fill in the blanks for each category, and the machine will finally understand exactly what you want it to do.
My biggest mistake early on was writing prompts like I was sending a friendly text message to a real person. Once I realized the machine just needs cold, hard keywords separated by commas, my image quality improved overnight. Now, I keep a sticky note on my desk reminding me to stick to the basic three-part formula before I try adding anything extra.
Next-Level Prompting Techniques for Professionals
Once you master the basic three-part formula, you are ready to take complete control over your final artwork. The basic steps will get you great results, but these advanced secrets will give you absolute precision.
Let us look at how the professionals maintain long-term success and fix stubborn issues when the machine refuses to listen.
Mastering the Art of Negative Directives
Sometimes, no matter how perfectly you describe what you want, the software adds things you absolutely hate. It might add extra fingers, ugly text, or a weird blue tint to your background. This is where negative directives come in to save your project.
Instead of only telling the system what to include, you must also tell it exactly what to exclude. Most advanced platforms have a specific box or a special code (like adding "--no" at the end of your text) just for this purpose.
If you are trying to generate a clean portrait and the system keeps adding messy text in the background, simply use your negative box to type "text, watermarks, letters, words." The machine will immediately strip those elements out of the next generation.
Here is a practical scenario. You want a modern living room, but the software keeps putting a big ugly television on the wall. Your positive text is "Modern minimalist living room, bright sunlight." Your negative text should be "television, screens, monitors, electronics."
This acts like a protective shield for your artwork. It forces the system to focus entirely on your positive words while actively blocking the junk you do not want to see.
Controlling the Chaos with Aspect Ratios and Weights
The default square shape is rarely useful for real-world projects. If you are making a YouTube thumbnail, you need a wide image. If you are making a phone wallpaper, you need a tall image. You must command the aspect ratio before you hit generate.
Different tools have different ways of doing this. Some have simple buttons, while others require you to type specific parameters at the end of your sentence, like "--ar 16:9" for a wide screen. Always set your dimensions first, because changing the shape later will completely change the composition of your picture.
Another powerful secret is using word weights. Sometimes the machine ignores a very important word in your sentence. For example, you ask for a "giant red apple on a small table," but the apple comes out tiny.
You can force the system to pay extra attention to a specific word. In some platforms, you can use brackets or numbers to tell the machine, "This word is twice as important as the rest." By highlighting the word "giant," you force the artificial intelligence to obey that specific command over everything else.
By combining negative shields with aspect ratios and word weights, you transition from a casual user into a true director of digital art.
The Biggest Traps You Must Avoid
Even with the best formulas, it is incredibly easy to fall into bad habits. When you are learning how to write effective prompts for AI image generators, avoiding mistakes is just as important as knowing the right steps.
Here is a detailed list of the five most common traps that will instantly ruin your results.
1. Writing a Whole Essay Instead of Keywords
Many beginners write long, conversational paragraphs. They say things like, "Hello, can you please make a picture of a nice dog running because he is very happy today." The machine does not understand grammar or polite conversation. These filler words confuse the system. Stick strictly to comma-separated keywords and clear descriptions.
2. Mixing Contradictory Art Styles
If you ask for a "highly photorealistic 3D cartoon watercolor," the machine will panic. You are asking for three completely different mediums at the same time. The result will be a muddy, ugly mess. Pick one single artistic style per generation and commit to it fully.
3. Forgetting to Define the Background
If you only describe a character, the software has to invent the entire background by itself. It might put your medieval knight in a modern grocery store simply because you forgot to tell it where he belongs. Always include a setting, even if it is just a simple "solid gray background."
4. Using Vague and Subjective Adjectives
Words like "beautiful," "awesome," or "good-looking" mean absolutely nothing to a computer. What you think is beautiful, the machine might interpret completely differently. Instead of saying "a beautiful dress," say "a sparkling red silk evening gown." Use descriptive, physical facts instead of personal opinions.
5. Giving Up After the First Try
These models are built on randomness. The very first picture you generate will almost never be perfect. The biggest mistake you can make is assuming your text was bad just because the first result was weird. You must hit the generate button three or four times with the exact same text to see the full range of possibilities.
If you fail to avoid these simple mistakes, you will continue to burn through your paid credits and miss your creative deadlines. Keep your words clean, clear, and logical.
Your Roadmap to Stunning Digital Art
Learning to communicate with these powerful tools is a journey of trial and error. The secret is simply understanding that you are programming a visual outcome, not just typing a search query.
You now have a solid, scientific foundation. You know how to prioritize your main subject, command the exact lighting, and wrap the whole thing in a specific artistic medium. You also know how to use negative shields and avoid the conversational traps that ruin so many great ideas.
Take a deep breath and let go of the frustration from your past attempts. You are no longer guessing in the dark. You have a structured, professional framework that will give you beautiful, usable results every single time.
Open your favorite platform right now, apply the three-step formula we discussed, and watch your imagination come to life exactly the way you pictured it. The power to create anything you want is finally in your hands.
Now that you understand the core foundation of talking to the machine, we need to push your skills even further. The standard three-step process we just covered will give you very good images, but we want spectacular results.
To achieve professional-level artwork, you must start thinking like an experienced art director. As noted by technology researchers at Wired regarding artificial intelligence tools, the most successful users treat the text box like a physical camera lens. You are not just asking for a picture; you are commanding a highly advanced virtual photoshoot.
Let us look at the secret techniques the professionals use to get absolute perfection every single time.
Taking Absolute Control Over Your Art Generation
Once you master the subject, lighting, and style, you need to tell the software exactly how to frame the shot. Most beginners completely ignore this step, which is why their images always look a little bit boring.
If you do not specify a camera angle, the system will almost always give you a flat, eye-level view. We want to change that completely.
Directing the Virtual Camera Angle
Changing your perspective completely alters the story your image tells. Think about a simple coffee cup sitting on a wooden table. If you shoot it from the standard eye level, it just looks like a normal morning desk.
But what if you type "extreme macro shot, camera resting on the table, looking up at the coffee cup"? Suddenly, that simple cup looks huge, dramatic, and incredibly interesting. You are forcing the machine to position itself creatively.
You have to be just as careful with these settings as a professional photographer. Just like you would carefully calibrate your photography drone before flying to capture the perfect aerial angle, you must precisely calibrate your text commands.
Try using these specific framing phrases in your next generation:
- Bird’s-eye view: Looks straight down from the sky, great for cities or large crowds.
- Dutch angle: Tilts the camera slightly to the side, creating a feeling of action or uneasiness.
- Over-the-shoulder shot: Puts the viewer right behind a character, making the scene feel very personal and engaging.
Injecting Specific Emotion and Vibe
Here is a hard truth: machines do not have feelings. They do not understand human emotion unless you explicitly type it out for them. If you ask for a "rainy street," the machine will just draw wet pavement.
If you want the image to feel sad and lonely, you have to add emotional keywords. You need to command the exact mood you want the viewer to feel when they look at your artwork. According to visual psychology studies by Psychology Today on color perception, specific lighting tones and environments directly control how our brains react to an image.
Instead of just saying "a rainy street," try adding words like "gloomy, desolate, muted colors, feeling of isolation." The software will immediately change the lighting, add fog, and darken the shadows to match your emotional request.
If you want a happy image, use words like "energetic, vibrant colors, joyful atmosphere, bright spring morning." By adding just two or three emotional keywords, you give your digital art a real human soul.
Building Your Personal Prompt Library
The biggest secret to long-term success is organization. You should never rely on your memory to recreate a beautiful image. When you finally discover a combination of words that creates a stunning style, you must save it immediately.
I highly recommend keeping a simple text document on your computer just for this purpose. You can break it down into different categories like "Best Watercolor Styles" or "Hyper-Realistic Portrait Keywords."
Treat this digital library like a stress-free system for organizing financial documents. When everything is neatly filed in its proper place, you never have to panic or start your projects from scratch again. You just open your folder, copy your favorite base formula, and change the main subject.
The Hidden Traps Destroying Your Final Images
Even when you know the right techniques, it is incredibly easy to fall back into bad habits. The platforms are designed to be simple, which often tricks people into being lazy with their text.
If you want to protect your creative energy and stop wasting your daily credits, you must avoid these major pitfalls. Here is a detailed breakdown of the five biggest mistakes that will ruin your final output.
1. The Meaningless Word Salad Trap
Many people believe that typing more words automatically makes the picture better. They will copy a massive paragraph filled with random adjectives like "ultra-detailed, super awesome, masterpiece, trending on ArtStation, 4k, 8k, best quality."
This is a terrible strategy. The machine gets confused when it has to process fifty different descriptive words at once. It loses focus on your main subject and starts blending things together in a very messy way.
Instead of typing a giant paragraph of fluff, stick strictly to five or six powerful, specific keywords. Keep your instructions clean and direct.
2. Forgetting Your Target Aspect Ratio
Imagine spending an hour generating the most beautiful, highly detailed wide landscape. You are thrilled with the result, but then you realize you needed a tall, vertical image for an Instagram story. You cannot just crop a wide picture without ruining the entire composition.
Failing to lock in your aspect ratio at the very beginning is a massive waste of time. Using the wrong image shape is exactly how poor video editing secretly ruins your revenue on social media, because bad framing completely destroys the viewer's experience. Always type your ratio command (like --ar 9:16) before you even think about the main subject.
3. Blindly Copying Complex Formulas
There are thousands of websites where people share their successful generation texts. It is very tempting to just copy a 200-word command from a professional artist and paste it into your own account.
The problem is that you have no idea which specific word is doing the heavy lifting. When you try to change the main character in their long formula, the whole image completely breaks apart. You are driving a complex machine without knowing what the buttons do.
Instead of blind copying, take their formula and break it apart. Test out small sections of their text to see exactly how it changes the lighting or the background.
4. Giving Up After the First Roll
These systems are built on random noise generation. This means that even if your text instructions are 100% perfect, the very first image might still look a bit strange. The software is just guessing how to arrange the pixels.
Most beginners will type a great sentence, see a bad result, and immediately assume they did something wrong. They delete their text and start over.
You must learn to trust your formula. Hit the generate button three or four times with the exact same text. Let the machine roll the dice a few times, and you will almost always find the perfect shot hidden in the next batch.
5. Ignoring the Power of Negative Space
We talked about negative prompts earlier, but it is worth repeating because it is the most common mistake. People spend all their time telling the machine what to draw, and zero time telling it what to avoid.
If your character's face looks slightly distorted, do not just keep adding words like "perfect face." Instead, add negative commands like "deformed, ugly, asymmetrical, bad anatomy."
By actively pushing away the bad elements, you naturally force the good elements to the front. You must build a strong negative shield for every single project you care about.
Your Journey to Becoming a Digital Art Master
Learning how to talk to these machines is not a magical talent you are born with. It is simply a logical skill that you build through practice and observation. You now have a complete, professional framework to guide you.
You understand how to define a clear subject, command the lighting, and lock in the perfect camera angle. You also know exactly which common traps to avoid so you do not waste your time and energy.
This process requires a bit of patience at first. Much like a structured plan to eliminate credit card balances, you need daily commitment and a clear strategy to reach your ultimate goal. You cannot expect perfection on day one, but if you stick to the rules we discussed, you will see massive improvements immediately.
Do not let bad generations discourage you. Every weird, distorted image is just a clue telling you which keyword you need to change.
I want you to open your favorite generation tool right now. Take a simple idea from your head and apply the strict three-part formula. Add a creative camera angle, sprinkle in some emotional mood words, and hit that generate button.
You have the power to bring any concept to life perfectly. Trust the process, keep your commands clean, and enjoy the incredible process of creating digital masterpieces.
Learning this simple system changed everything for me, turning a daily headache into the most fun part of my workday. If I can go from making terrifying, mutated monsters to generating exactly what is in my head, I promise you can do it too. Go open your favorite AI tool right now and just try the three-step formula—you will be amazed at what you create today!
Disclaimer: AI technology updates constantly, and the platforms mentioned in this guide may change their features or rules over time. The tips shared here are based on my personal experience and current best practices, but your exact results might vary depending on which software you are using today.