The Hidden Frustration Behind Flawed 3D Materials
Every 3D artist knows the absolute joy of building a beautiful model from scratch. You spend hours pushing vertices, smoothing edges, and perfecting the overall shape.
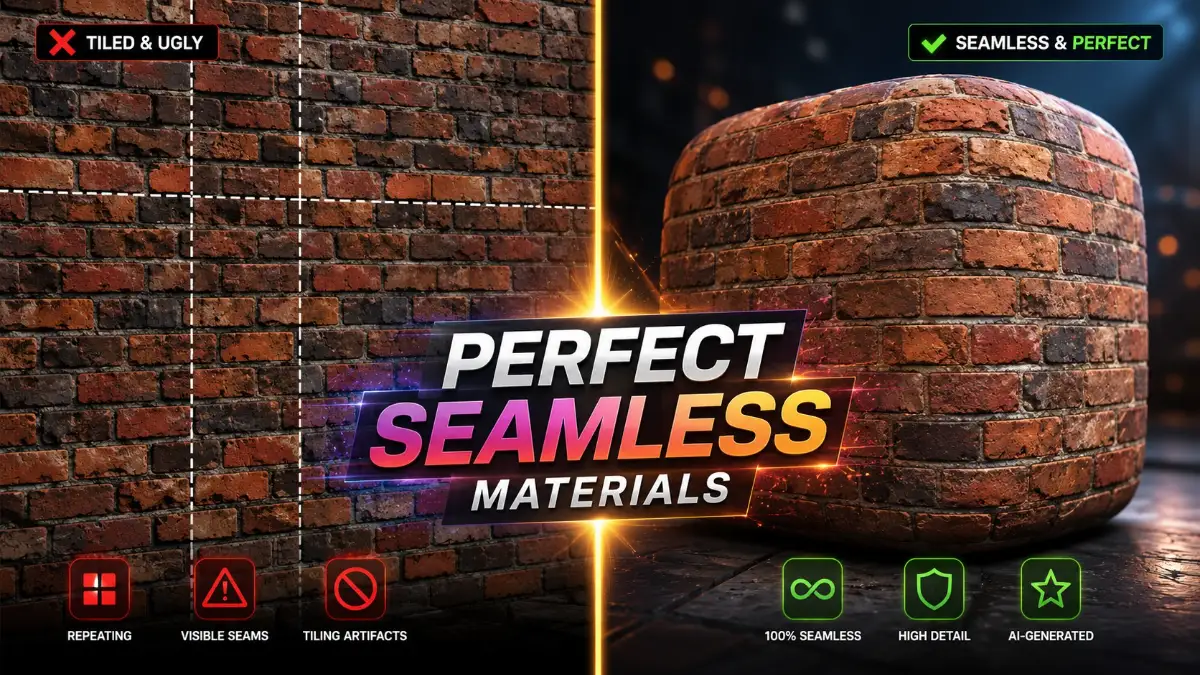
Then comes the texturing phase, and your excitement quickly turns into deep frustration. You apply a downloaded image to your model, and suddenly, ugly grid-like repeating patterns appear everywhere. The edges of the image simply do not match up. It completely destroys the illusion of realism, making your hard work look like a cheap video game from decades ago.
I still remember staying up until 3 AM for a freelance client, almost crying because a "free" wood texture I downloaded kept showing a ridiculous grid pattern across a massive floor. I spent more time trying to hide the ugly seams with random rugs and virtual furniture than actually modeling the room. That night made me realize I was letting bad assets completely ruin my love for 3D art, which forced me to find a smarter way to work.
You try to fix it manually by spending hours in photo editing software. You use the clone stamp tool over and over, trying to blend the harsh lines, but it never looks quite right. This endless cycle of trial and error is exhausting. Instead of being creative, you become trapped in a technical nightmare just trying to make a simple brick wall look normal.
Why Traditional Methods Often Fail You
People constantly struggle to find good solutions for this exact problem. Much of this happens because the internet is filled with bad advice and poor resources.
Here is why you might be failing to get those perfect results:
- Relying on low-quality free websites: Many free texture platforms offer images that are simply cropped photos, completely lacking proper edge matching.
- Following outdated tutorials: Many guides still teach manual blending techniques that take hours and rarely produce photorealistic results.
- Misunderstanding lighting: Using base photos that have baked-in shadows makes it physically impossible to tile them smoothly without obvious repetition.
- Wasting money on bad asset packs: Even paid material bundles often contain flawed images that still show visible grids when scaled down.
How Bad Textures Destroy Your Peace of Mind
Constantly fighting with your tools takes a heavy toll on your mental well-being as a creator. It is not just about a bad image; it is about how it makes you feel.
Consider how these issues slowly eat away at your confidence:
- Severe imposter syndrome: When your final render looks fake because of bad tiling, you start to doubt your actual modeling skills.
- Missed client deadlines: Wasting a whole afternoon trying to fix a single wood grain pattern puts your entire project timeline at risk.
- Creative burnout: The technical stress of fixing seams drains the fun out of 3D art, making you want to quit altogether.
- Loss of income: Clients notice unprofessional, repeating patterns, which can lead to rejected work and lost payment opportunities.
Your tools should work for you, not against you. Let us explore a much better, smarter way to handle this workflow.
The Smart Framework for Generating Perfect Tiling Materials
You do not have to suffer through the old, painful ways of making materials anymore. Thanks to recent advancements in artificial intelligence, you can automate the most difficult parts of texturing.
AI tools are specifically designed to understand patterns, lighting, and edge matching. They can generate completely unique, high-resolution surfaces in a matter of seconds. However, using these tools requires a specific approach. If you just type a few random words into an image generator, you will still get bad results.
I am going to show you exactly how to control this technology. By following a proven, structured method, you will save hours of manual labor and achieve photorealistic renders every single time.
Step 1: Choosing the Right Artificial Intelligence Engine
Not all image generators are built the same way. Some are great at making artistic portraits, but they are terrible at making technical 3D assets. If you want seamless textures, you need to pick software that actually understands what a "tileable" image is. Midjourney is a popular choice because it has built-in parameters specifically for repeating patterns.
There are also dedicated platforms like Leonardo AI or specific 3D material generators that offer specialized tools just for game developers and artists. These platforms often feature sliders for roughness, metallic values, and normal mapping right out of the box. Think of it like choosing the right vehicle for a job. You would not use a sports car to carry heavy construction materials.
Similarly, do not use a general-purpose AI when you need precise, technical game assets. Pick a tool that clearly states it supports seamless generation.
For example, when you use Midjourney, simply adding the "--tile" command at the end of your prompt changes the entire way the AI processes the image. It forces the system to mathematically match the left edge to the right edge.
This simple feature immediately solves 90% of the problems traditional artists face. Start by testing out one of these capable platforms to see the magic for yourself.
Step 2: Crafting the Perfect Prompts for Material Generation
Talking to an AI is very different from searching for an image on Google. You have to be incredibly specific about what you want, almost like writing a recipe. The biggest mistake beginners make is asking for too much artistic flair. When generating materials, you actually want the image to be as flat and boring as possible.
You must command the AI to use "flat lighting" or "studio lighting" with "no harsh shadows." If the AI draws a beautiful sunbeam across your brick wall, that sunbeam will repeat over and over when you tile it. Real-world lighting will be added later inside your 3D software. The base image needs to be completely neutral, acting only as the color data.
My biggest mistake when I first started using AI was asking it for "moody, cinematic lighting" on a brick wall texture. It looked amazing on its own, but once I put it in Blender, those baked-in shadows completely fought with my scene's actual lights and looked terrible. Now, I always beg the software for the most boring, flat lighting possible, and it is an absolute game-changer for realism.
Here is a practical scenario: Let us say you want a realistic wooden floor. Do not type "beautiful wooden floor in a sunny room."
Instead, type something like: "Top-down orthographic view of clean oak wood planks, flat neutral lighting, no shadows, high detail, photorealistic." Notice the difference? We specified the camera angle by saying "top-down orthographic view." This ensures the camera is pointing straight down, preventing any weird perspective distortions.
If you shoot a photo of the ground at an angle, the bottom of the image will look closer than the top. An AI will do the exact same thing unless you specifically tell it not to. By mastering the exact wording, you take full control over the output. You become an art director guiding a very fast, very obedient digital assistant.
Step 3: Processing the AI Output into Full PBR Maps
Getting a flat, seamless image is a massive victory. However, a single flat image does not look realistic in a modern 3D engine.
The real world has depth, scratches, reflections, and tiny bumps. To make your AI image look truly believable, you need to convert it into a Physically Based Rendering (PBR) material.
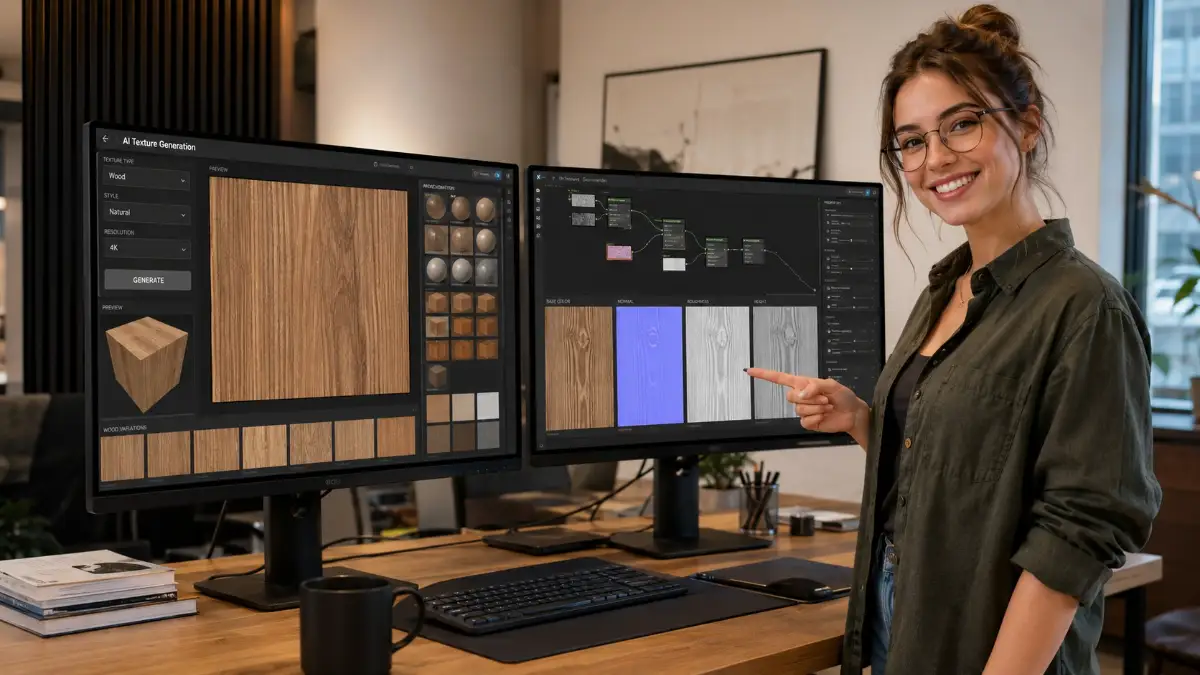
A PBR workflow uses multiple different black-and-white images to tell the 3D software how light should react. You will need a Normal map for bumps, a Roughness map for shininess, and a Displacement map for actual depth.
You do not have to create these manually either. There are incredible AI-powered tools available online that automatically extract these maps from your single base image.
Programs like Materialize or various web-based AI normal generators can analyze the colors in your flat picture. They use machine learning to guess where the cracks and bumps should be.
Let us look at a real-life example. Imagine you generated a nice, seamless cobblestone texture.
If you put just that flat color image on a 3D plane, it will look like a sticker. But when you run it through an AI map generator, it creates a custom Normal map.
Now, when you put a virtual sun in your 3D scene, the light will physically catch the edges of the cobblestones. The spaces between the stones will cast tiny, realistic shadows.
This scientific approach mimics actual real-world physics. Light bounces differently off a shiny wet leaf compared to a dry, rough piece of concrete.
By generating accurate Roughness maps through AI, you tell your 3D engine exactly how to handle these light bounces. This step is what separates amateur renders from professional, studio-quality artwork. Always take the extra five minutes to generate your complete PBR maps. It is the secret ingredient that makes artificial intelligence outputs look incredibly natural.
If you are a bit confused about how normal and roughness maps actually work inside your 3D software, watch this quick video breakdown below. It will show you exactly how to plug these maps in correctly, and then you can keep reading to learn how to polish these textures to industry standards.
Taking Your Smart Textures to the Industry Standard
Generating a basic square image using artificial intelligence is just the beginning of your texturing journey. If you want your 3D artwork to look like it belongs in a high-budget movie or AAA game, you need to apply some professional techniques. The best digital artists do not just click a button and walk away from their computers. They follow a strict post-processing routine to guarantee absolute perfection in every single render.
Many beginners are incredibly surprised when their newly generated surface looks blurry inside a real 3D engine. This happens because most artificial intelligence platforms intentionally limit their output resolution to save server costs. To fix this common issue, you must run your newly generated seamless image through a dedicated AI upscaler. Following industry-standard 3D material practices, high-quality assets always require a minimum of 4K resolution to look crisp. You can use free open-source upscalers to multiply the pixel count without losing the perfectly matching edges.
Another amazing secret is to mix these artificial outputs with actual real-world photography. Sometimes, a smart image generator might miss the tiny micro-scratches or dirt particles you see in the real world. You can easily capture these tiny details yourself by going outside with a decent camera. Just like how mastering your photography drone settings helps avoid costly field errors, taking clear reference shots prevents weird texturing mistakes. You can then blend your real photos over the generated base using basic layer masks in any photo editor.
Creating a proper folder structure early on is your best defense against project chaos. When you generate hundreds of different variations, your computer hard drive will quickly become a nightmare of random file names. You must explicitly organize your maps by category, creating specific folders for wood, metal, plastic, and concrete. Developing this solid habit early is identical to how organizing your financial documents creates a stress-free system for your personal life. A clean, searchable asset library will literally save you hours of panic during a tight client deadline.
Always remember to test your new files inside a real-time game engine immediately after processing them. It is very easy to assume an image looks great in a basic web browser, but lighting behaves differently in complex 3D environments. According to official real-time rendering and texture guidelines, digital materials must be tested under multiple different virtual sun angles. This simple testing phase guarantees that your normal and roughness maps are reacting accurately to shifting light sources.
Master the Art of Material Blending
Professional 3D artists rarely rely on just one single texture for a large object. If you are building a massive brick wall, using just one AI-generated image will eventually look repetitive, even if it tiles perfectly. The secret trick is to generate three slightly different variations of the same exact brick pattern.
You can ask the smart software to generate one clean brick texture, one dirty brick texture, and one mossy brick texture. Once you have these three seamless files, you can use vertex painting in your 3D software to blend them together. You can paint the mossy texture near the bottom where the wall touches the wet ground.
Then, you can paint the dirty texture around the middle sections where mud might splash up. Finally, you leave the clean texture for the very top of the wall where the rain washes it. This simple blending technique breaks up any hidden repeating patterns instantly. Your scene immediately transforms from a basic computer render into a highly realistic, believable digital world.
Controlling Color Spaces Perfectly
One technical detail you must pay close attention to is your color space management. When you download an image from an artificial intelligence tool, it usually comes in a standard sRGB color format. This format is great for your base color map, which is what gives your object its actual visual color.
However, your secondary maps like roughness, metallic, and normal maps must behave differently. These secondary maps do not hold color data; they hold pure mathematical data that tells the engine how to bounce light. Because of this, you must set these specific maps to "Linear" or "Non-Color Data" inside your 3D software.
If you forget to change this setting, the 3D engine will try to read your black-and-white roughness map as a colorful picture. This forces your object to look strangely shiny in the wrong places, completely ruining the realism. Taking ten seconds to switch the color space setting is the easiest way to make your materials look significantly better. According to standard digital material properties, keeping your data maps strictly linear ensures accurate light physics calculation.
Dangerous Texturing Pitfalls You Must Avoid
Even with the smartest software available today, things can easily go wrong if you are not paying close attention to the details. Many new 3D artists fall into the exact same traps and end up with folders full of unusable files. Let us deeply break down these common mistakes so you can completely protect your valuable time and energy.
Mistake 1: Leaving Directional Shadows in Text Prompts
I briefly mentioned this earlier, but it remains the absolute number one reason digital materials fail to tile properly. If your prompt asks the system for "dramatic lighting" or "heavy sunset shadows," the artificial intelligence will paint those dark spots directly into the image.
When you place that image onto a 3D object, it will look like there are tiny fake suns baked into every single inch of the model. When your actual virtual scene lighting moves, these baked-in shadows will stay completely still, breaking the laws of physics. Your text prompts must always strictly request "flat ambient light," "diffuse color only," or "albedo map style" to keep the surface flat.
Mistake 2: Ignoring Scale and Real-World Measurements
Imagine generating a beautiful wooden plank surface meant for a modern kitchen floor. If you do not test the actual scale in your software, you might end up with wood grains that look the size of giant tree trunks. A single generated square might represent one meter of space in the real world, or it might accidentally represent ten meters.
You have to adjust the UV mapping coordinates correctly in your software to ensure the scale matches real human proportions. A great trick is to place a standard 3D human model next to your textured wall just to double-check the visual sizing. If the bricks are bigger than the human character's head, you need to scale the texture down immediately.
Mistake 3: Relying Exclusively on Flat Color Maps
A flat color image will never look photorealistic in a modern engine, no matter how much detail the software packed into it. Beginners often skip generating the matching bump, normal, and roughness maps because they simply feel too lazy. This mistake forces the surface to look exactly like cheap plastic wrap stretched tightly over a cardboard box.
If you present this kind of flat work to clients or post it online, it will severely hurt your professional reputation as an artist. Showcasing poorly processed 3D assets is just as damaging to your career as how bad video editing secretly destroys your content growth on social media platforms. Always take the extra time to generate the full set of physically based rendering maps.
Mistake 4: Generating Overly Complex Repeating Patterns
Sometimes, less is actually much more when it comes to creating repeating surfaces for environments. If you ask the software to generate a brick wall with a highly unique, broken green stone right in the middle, that stone will stand out heavily.
When that image repeats ten times across a long digital hallway, the viewer will easily spot that exact same broken green stone ten times in a row. This completely breaks the immersion and reminds the viewer that they are looking at a repeating computer graphic. It is much smarter to generate completely clean, boring surfaces and add unique damage manually later using transparent decals.
Mistake 5: Failing to Manually Verify Seamless Edges
While smart generation platforms are incredibly advanced, they are not completely flawless machines. Very rarely, they might leave a tiny, noticeable pixel mismatch exactly where the left and right borders are supposed to connect.
You should always open your newly generated image in a basic photo editing software before saving it permanently. Use the offset filter tool to shift the image so the edges meet perfectly in the center of your screen. Fixing a tiny one-pixel error takes just two seconds with a healing brush, but missing it completely ruins an overnight render.
Start Upgrading Your Digital Environments Today
You now have a complete, professional roadmap to solving one of the most frustrating problems in modern 3D design. You no longer have to spend endless hours manually cloning edges or settling for low-quality downloaded images. By properly leveraging smart generation tools, you can build an endless library of perfect, high-resolution surfaces.
The transition from traditional texturing to AI-assisted generation might feel a little strange during your first few attempts. However, once you successfully create your very first flawless PBR material from scratch, you will never want to go back. Your workflow will become significantly faster, allowing you to focus entirely on your actual creative vision instead of fighting technical bugs.
I strongly encourage you to open your favorite generation tool right now and try typing your very first flat-lighting prompt. Start with something simple, like a clean concrete sidewalk or a basic wooden floorboard. Take that image, run it through a normal map generator, and apply it to a basic sphere in your software.
Seeing the virtual light perfectly catch the tiny bumps of a material you just created is an incredibly rewarding feeling. You possess the power to build completely unique worlds, and now you have the exact tools needed to make them look absolutely stunning. Keep practicing your specific prompts, stay organized with your files, and enjoy the amazing process of bringing your digital art to life.
Looking back, learning how to generate my own materials was the single best thing I ever did for my 3D career. I went from stressing over tight deadlines to actually having fun building worlds again, and I know you will feel that exact same relief. Take a deep breath, open up a generation tool today, and just try making one simple texture—you are going to be amazed at what you can create.
Disclaimer: The information provided in "How to Generate Seamless 3D Textures Using AI Tools Easily" is for educational and general informational purposes. AI generation tools and 3D software update frequently, meaning specific features, commands, or interfaces may change over time. I highly recommend reviewing the specific terms of service and commercial licensing agreements of any AI platform before using generated materials in paid client work or commercial projects.