The Hidden Frustration Behind Generating Beautiful Digital Art
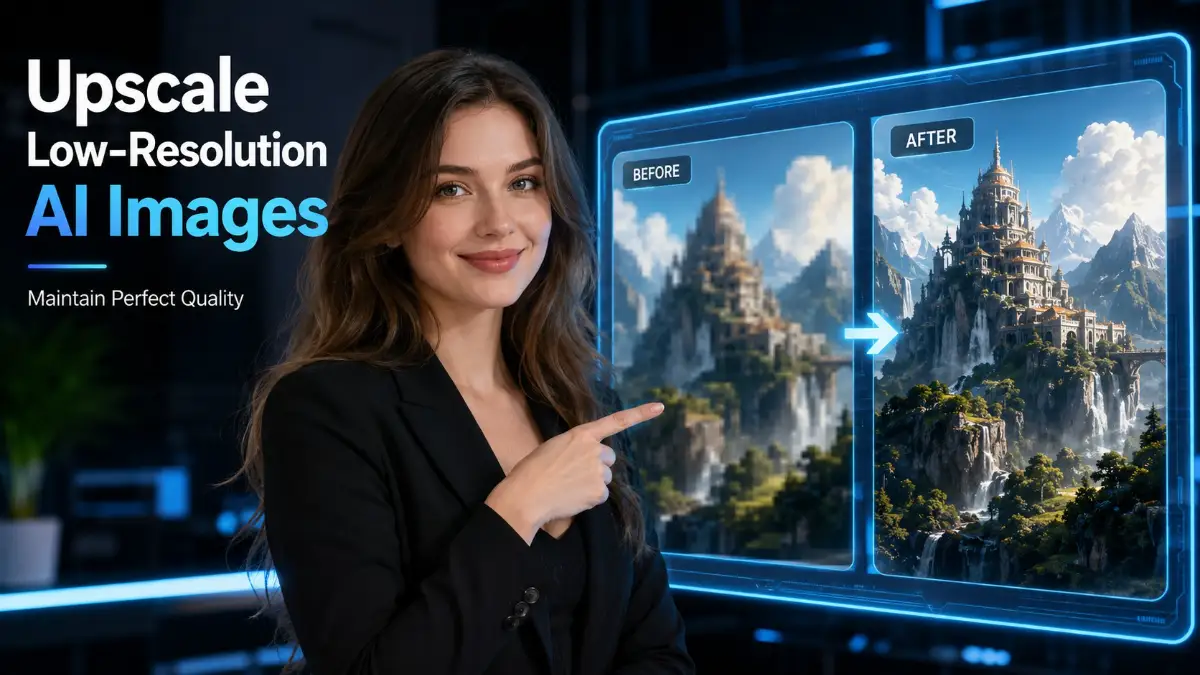
I still remember the exact moment my heart broke over an AI image. I spent three hours typing the perfect prompt for a client project, and the thumbnail looked like an absolute masterpiece. But when I downloaded it and zoomed in, it was just a messy, unusable blur of pixels. That embarrassing failure forced me to figure out how to actually fix image quality without losing my mind.
You spend hours crafting the absolute perfect text prompt. You hit the generate button, hold your breath, and finally, the output matches your exact imagination. The colors are stunning, the lighting is gorgeous, and the composition is flawless.
But then, you try to zoom in to admire your work. Your heart instantly sinks as you realize the terrifying truth. The image is horribly blurry, highly pixelated, and completely unusable for anything outside of a small mobile screen.
This specific problem is secretly destroying the workflow of countless digital creators. According to experts reviewing the creator economy on Forbes, content creators are losing massive opportunities simply because their technical file quality does not match their creative vision.
When regular people face this annoying issue, they often turn to the internet for quick solutions. Unfortunately, this usually leads to even more terrible results.
- You might try using basic, free web tools that promise magic results but actually just stretch the existing pixels until the picture looks like a messy watercolor painting.
- Many beginners follow bad advice and simply increase the DPI settings in standard photo editing software. They do not realize that changing DPI without adding fresh data does absolutely nothing to improve the actual clarity.
- You might end up downloading random mobile applications that aggressively over-sharpen your artwork, destroying the original artistic intent entirely.
- These wrong methods waste your precious time and completely ruin your original file, leaving you incredibly frustrated and stuck.
This endless cycle of generating amazing concepts but failing to export them properly slowly eats away at your mental peace. You begin to question your own abilities.
- You start feeling terrified to accept big client commissions because you are worried they will reject your pixelated deliverables.
- Your overall creative confidence drops heavily. You hesitate to post your creations on professional portfolios.
- Just like how bad video editing is secretly killing your youtube money and how to fix it, presenting low-resolution artwork secretly ruins your professional reputation.
- Instead of enjoying the creative process, you spend all your energy fighting with software limitations, completely draining your passion for design.
The Professional Blueprint for Flawless Image Clarity
We are going to solve this massive headache together right now. You do not need to be a software engineer to figure this out. You just need a logical, simple step-by-step action plan to completely transform your workflow.
I am going to walk you through exactly how to upscale low-resolution AI images while keeping every single detail perfectly intact.
If you are a visual learner, watch this quick video breakdown showing exactly how I rescue my blurry AI images step-by-step before you read the rest of my advanced tricks below.
1. Understand the Science of Smart Pixel Generation
Before you click any buttons, you need to understand why standard resizing methods always fail you. Think about trying to spread a tiny amount of butter over a massive piece of bread. The butter gets too thin, and the bread tastes dry.
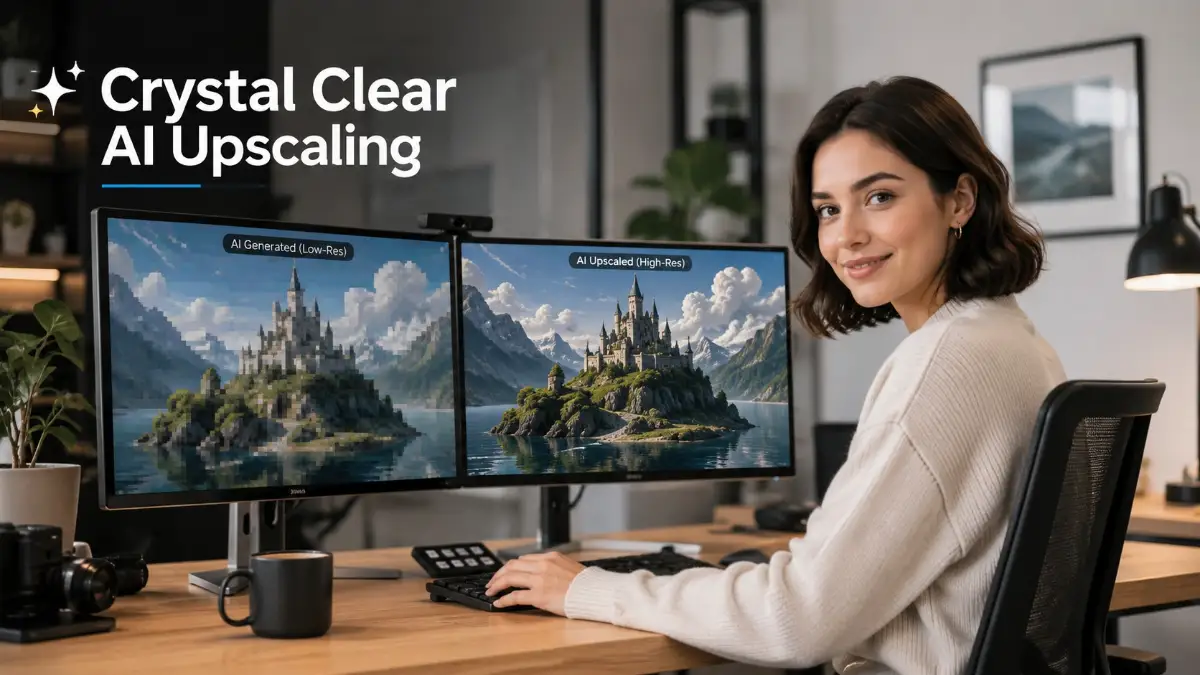
This is exactly what happens when you use regular software to make a picture bigger. The software just takes the limited color data you have and stretches it across a wider area. It cannot invent new details. This old method is called basic interpolation. It is mathematically designed to fail when you need high-definition results.
To actually solve this, we must use smart technology that understands context. Modern software does not just blindly stretch your picture. It actually "looks" at the contents of your file. If the software identifies a blurry human eye in your picture, it searches its massive database to understand what a clear human eye should look like. It then generates brand-new, highly accurate pixels to fill in the missing gaps.
This is the only scientifically proven way to increase size while maintaining realistic textures. Highly respected tech publications like Wired magazine frequently highlight how these advanced neural networks are completely changing the photography industry.
By understanding this difference, you can stop wasting your time on tools that only stretch your files. You will finally start seeking out tools that actually rebuild your files from the ground up.
2. Choose the Exact Right Engine for Your Unique Style
Here is a massive secret that most beginners completely misunderstand. Not all enhancement tools treat your files the exact same way. You must match your specific software engine to your specific type of artwork.
If you just generated a highly realistic photograph of a person, you need an engine that was trained heavily on real human faces. These specific engines understand the tiny details of skin pores, realistic lighting, and individual eyelashes. If you make the mistake of using a general-purpose tool on a realistic portrait, the final result will look heavily edited. The skin will look like smooth, shiny plastic.
On the other hand, what if you are generating anime-style illustrations or flat graphic designs? You need a completely different mathematical approach. For digital paintings, you need tools that respect sharp, clean lines and solid blocks of color. If you use a photography-based tool on an illustration, the software might try to add realistic texture to a flat cartoon face. This looks incredibly weird and ruins the artistic style.
Let me give you a highly practical scenario. I recently helped a friend who was trying to print a massive wall poster of a digital watercolor painting. He kept complaining that the final print looked messy and completely unnatural.
I looked at his process and realized he was using a tool built exclusively for fixing old family photographs. The software was misinterpreting his delicate watercolor brushstrokes as "noise" and trying to erase them.
We quickly switched his settings to an engine designed specifically for digital art. The results were instantly breathtaking. The brushstrokes remained beautifully visible, and the edges became incredibly sharp.
Always look closely at the settings inside your chosen software. You will usually see options labeled "Photography", "Digital Art", or "Anime". Selecting the correct category is the biggest key to maintaining your original quality.
3. Master the Essential Pre-Processing Clean Up
I am about to share a technique that will immediately separate you from the amateurs. Most people make the massive mistake of trying to enlarge a broken file. You should never try to increase the size of something that already looks bad.
Think about building a massive house. You cannot build a safe, tall structure on top of a highly unstable, cracked foundation.
If your original small picture has weird color spots, random digital noise, or heavy compression blocks, the software will see those mistakes as "details". When you increase the size, the software will actually enhance and sharpen those ugly mistakes. You will end up with a massive, high-definition version of a terrible image. We absolutely want to avoid this nightmare scenario.
To prevent this, you must clean your file before you ever touch the size settings. This is your essential pre-processing phase. Start by opening your original file and zooming in closely on the dark shadow areas. This is usually where ugly digital noise hides. Apply a very gentle noise reduction filter to smooth out these specific trouble spots.
If there are weird, extra fingers or strange background objects generated by mistake, erase them now. Do not wait until the picture is massive to try and fix structural errors. Just like you need to master your photography drone calibration tips to avoid costly repairs before you fly, you must prepare your file before you scale. By spending just five extra minutes cleaning up your original file, you are giving the software a pure, flawless canvas to work from.
When the software has clean data, it performs absolute miracles. Your final colors will look incredibly rich. The fine details will pop out naturally. Once your base foundation is completely clean and prepared, you can confidently push that size slider to 4x or even 8x. You will be amazed at how easily you can achieve perfect, professional-grade clarity every single time.4. Utilize the Magic of Incremental Scaling
Most people think you should just type in your final desired size and let the computer do all the heavy lifting in one single jump. This is actually a very risky move that often leads to weird visual glitches. When you ask the software to jump from a tiny icon directly to a massive billboard size, you are forcing the system to guess an enormous amount of missing information all at once. This heavy guessing often leads to distorted shapes and strange patterns appearing in your background.
Instead, professionals use a highly effective technique called incremental scaling. This means we increase the size in smaller, controlled steps.
For example, instead of jumping straight to a 4x increase, start by scaling the picture by 2x. Let the software carefully calculate and rebuild those missing pixels. Once that first pass is completely finished, save the file. Then, take that new, slightly larger file and run it through the software again for another 2x increase.
This step-by-step approach gives the system a much easier mathematical problem to solve each time. Because the software has more accurate data to work with on the second pass, the final results are incredibly smooth.
I used to make the silly mistake of jumping straight from a tiny file to a huge 4k resolution in one single click, and it always created weird, melted shapes in my background. Once I realized that taking baby steps and doubling the size twice was the real trick, my artwork finally started looking like a real professional studio made it.
You will notice a massive reduction in weird artifacts. The lines will stay perfectly straight, and complex details like hair or tree branches will look completely natural. It takes a few extra minutes, but the stunning quality difference is absolutely worth your time.
Step 5: The Secret Art of Texture Blending
Sometimes, even the absolute best software can make things look slightly too perfect. When a picture is flawlessly sharp with zero imperfections, the human eye instantly recognizes it as fake or artificially generated.
Real photography and physical paintings always have a tiny bit of natural grain or texture. To make your massive new file look authentic, you need to bring some of that natural feeling back.
Open your newly enlarged, crystal-clear file in your favorite editing program. Then, place your original, smaller file on a layer directly on top of it.
Stretch the small original file to match the new large size. Yes, this top layer will look blurry and terrible. That is completely fine.
Now, lower the opacity of that blurry top layer down to just 5% or 10%. This incredibly simple trick blends a tiny fraction of the original messy texture into your new, perfect file.
This technique softens the harsh, robotic edges that computer programs often create. It adds a beautiful, organic feeling back into your artwork.
Clients and viewers will look at your final piece and feel a sense of natural realism. They will have no idea that you used advanced computer tricks to achieve such a beautiful, organic texture.
Pro-Level Tactics for Studio-Quality Sharpness
Now that you understand the basic science and preparation, we need to push your skills even further. You have the clean foundation, but achieving true mastery requires a few more advanced techniques.
The goal here is not just to make the picture bigger. The goal is to make it look like it was originally created at a massive, high-end studio resolution.
Five Dangerous Pitfalls You Must Completely Avoid
Even with the best tools in the world, human error can quickly ruin a great project. You need to treat your workflow carefully, much like how you would meticulously organize your financial documents like a pro to avoid major headaches later.
Here are the five most common traps that completely destroy file quality. If you do not avoid these, all your hard work will be wasted.
1. Trying to Enhance Heavily Compressed JPEG Files
The JPEG format is designed to throw away data to save storage space. When you save a JPEG, it creates invisible blocks of messy pixels called compression artifacts.
If you feed a messy JPEG into your enhancement software, the system will permanently lock those ugly blocks into your massive final image. Always export your initial creations as uncompressed PNG files. A clean PNG ensures you are starting with the maximum possible data.
2. Pushing the Denoise Slider Way Too High
Most modern tools have a slider labeled "Denoise" or "Smooth". It is highly tempting to drag this slider all the way up to 100% to remove every single speck of dust.
If you push this slider too high, you will completely erase the beautiful micro-details of your artwork. Skin will lose its pores, fabric will lose its thread texture, and paintings will lose their canvas feel. Always keep this setting as low as possible.
3. Ignoring Background Details While Fixing Faces
Many tools have a special feature called "Face Restoration". This is amazing for fixing messy, asymmetrical eyes or weird teeth.
However, many users get so distracted by the perfect face that they completely ignore the background. The face might look 8k resolution, but the trees behind the person might still look like a blurry video game. Always zoom around the entire canvas to ensure the overall quality matches perfectly.
4. Relying on Outdated Free Web Browser Tools
There are thousands of free websites offering instant picture enhancement. The harsh reality is that running complex neural networks requires massive computing power.
These free websites cannot afford that power. They secretly use extremely outdated, basic algorithms behind the scenes. They will rarely give you professional, commercial-grade results. You must invest in dedicated desktop software or premium cloud services if you want true quality.
5. Upscaling Files That Are Already Massive
Sometimes people get greedy. They have a file that is already 4000 pixels wide, and they decide to push it to 12000 pixels just for fun.
If the file is already highly detailed, forcing it through these intense algorithms can actually damage it. The software might over-process the details, creating highly jagged, sharp edges that hurt the eyes. Only use these powerful tools when your starting resolution is actually restricting your goals.
Your Next Steps Toward Perfect Digital Mastery
You now possess the exact knowledge required to never worry about blurry, unusable files ever again. You understand the deep science of how pixels work and why standard methods fail.
You know exactly how to prepare your base files and choose the perfect mathematical engine for your unique artistic style. By combining incremental scaling with smart texture blending, you can now produce artwork that competes with the highest-end professional studios.
Do not let technical limitations hold your creativity back for another minute. Take one of your favorite, low-quality creations today and apply these exact steps.
Watch closely as the messy blur transforms into breathtaking, crisp detail right before your eyes. You have the power to control your digital environment completely. Go open your software, start practicing these methods, and share your absolute best work with the world confidently.
Mastering Advanced Enhancement Techniques for Studio-Grade Results
You have already learned the absolute basics of preparing your files and choosing the right mathematical engine. Now, we are going to push your digital skills to a completely professional level. These advanced tactics separate the absolute beginners from the highly paid artists.
To truly understand how digital information works, you should know that professional graphic designers treat every single pixel like a tiny block of colorful clay. According to digital imaging experts at Adobe, successfully managing high-resolution files requires a deep understanding of your original data structure. You cannot simply force these clay blocks to multiply without a clear strategy.
When you use heavy processing tools, your computer works incredibly hard. Hardware reviews from leading tech publications like The Verge frequently mention how modern graphics cards are specifically built to handle this massive neural network processing. We are going to use that extreme computing power to our advantage right now.
Instead of just running a basic automated process, you are going to take complete manual control over your final artwork. Let us explore exactly how you can build a flawless, long-term system for perfect image clarity.
The Hidden Power of Selective Detail Masking
One of the biggest secrets in the commercial design industry is a technique called selective masking. When you put your generated artwork through an enhancement tool, the software applies the exact same mathematical formula to the entire canvas. This sounds like a good idea, but it often creates very unnatural results.
Think about a beautiful portrait of a woman standing in a slightly blurry, dark forest. The focus should entirely be on her sharp, detailed face. If you force the software to dramatically sharpen the entire background forest, those distant trees will suddenly look extremely harsh and distracting.
Just like how poor visual presentation can quietly ruin your digital income through bad video editing, applying a blanket filter over your entire artwork makes the final piece look cheap and heavily manufactured. You want your main subject to pop, while the background remains soft and dreamy.
To fix this, you must run your file through your enhancement software and save that massive, highly detailed version. Then, open your standard photo editing program and place your original, softer file right below the new, sharp file on a separate layer.
By using a soft eraser tool or a digital layer mask, you can gently hide the sharp background of the top layer. This allows the soft, original background from the bottom layer to show through naturally. You are essentially combining the absolute best parts of both files to create one absolute masterpiece.
Establishing a Permanent Quality Control System
Fixing one single picture is a great start, but true professionals build systems that protect their work forever. If you want to succeed as a digital creator, you must create a highly organized workflow. You will quickly generate hundreds of amazing concepts, and losing track of your high-quality files is a massive headache.
You should treat your digital assets with the exact same care and attention you use to organize essential financial records efficiently. Create a very specific folder structure on your main hard drive right now.
Here is a highly effective folder structure you can copy immediately:
- Folder 1: Raw Generations. This is where you save the original, low-resolution outputs directly from your text-to-image software.
- Folder 2: Cleaned Base Files. This folder holds the files you have manually cleaned up and prepared, but have not yet enlarged.
- Folder 3: Final Studio Outputs. This is the exclusive home for your massive, perfectly enhanced, print-ready masterpieces.
Alongside your image files, always save a simple text document containing the exact words you used to generate the original art. Sometimes, a file is so badly pixelated that even the best software cannot save it. If you have the original text prompt securely saved, you can easily go back and generate a fresh starting point.
By taking five extra minutes to organize your workspace today, you save yourself hundreds of hours of frustrating searching in the future. You will always know exactly where your highest quality files live when a big client suddenly asks for them.
Five Dangerous Workflows That Quietly Destroy Image Quality
Many beginners excitedly jump into these powerful tools but end up completely ruining their beautiful art. They read terrible advice on random forums and blindly push buttons without understanding the consequences. We are going to protect your hard work by identifying these major traps.
If you ignore these warnings, you will waste hours of processing time. Even worse, you might accidentally deliver a terrible, glitchy file to a paying customer, permanently damaging your professional reputation. Here are the specific mistakes you must avoid at all costs.
1. Exporting Your Base Art as a Heavily Compressed JPEG
This is arguably the most common and destructive mistake people make. The JPEG file format was historically designed to throw away color data just to save a little bit of storage space on your hard drive. When you save a JPEG, the computer creates invisible blocks of messy, compressed pixels that completely ruin smooth color transitions.
If you feed a messy JPEG into your enhancement software, the system will permanently lock those ugly blocks into your massive final image. The software thinks those compression artifacts are actual details. Always export your initial creations as uncompressed PNG or TIFF files to ensure you are starting with maximum quality.
2. Pushing the Smoothing Sliders Way Too High
Most modern enhancement tools feature a specific slider labeled "Denoise" or "Smooth". Beginners absolutely hate digital noise, so they eagerly drag this slider all the way up to the maximum setting. This immediately creates a massive visual disaster.
If you push this slider too high, you will completely erase the beautiful, realistic micro-details of your artwork. Human skin will suddenly look like perfectly smooth, shiny plastic. You are essentially sanding down a beautiful piece of wooden furniture until you completely destroy the natural grain. Always keep this setting as low as possible.
3. Ignoring Background Elements While Focusing on Faces
Many advanced tools now offer a highly popular feature called "Face Restoration". This specific mathematical model is amazing for fixing messy, asymmetrical eyes or weirdly shaped teeth generated by the computer. However, many users get so completely distracted by the perfect face that they ignore everything else.
Just like you must perfectly calibrate delicate drone sensors before a flight to capture the entire scene properly, you must carefully inspect the edges of your digital canvas. The subject's face might look incredible, but the trees or buildings behind them might still look like a blurry video game from the past. Always pan around your entire canvas to ensure consistent quality.
4. Trusting Outdated Free Web Browser Extensions
There are thousands of free websites offering instant picture enhancement with just one single click. The harsh reality is that running complex neural networks requires massive, expensive computing power. These free websites simply cannot afford that kind of server power for millions of daily users.
To save money, these websites secretly use extremely outdated, basic resizing algorithms behind the scenes. They will rarely give you the professional, commercial-grade results you actually need. They often leave ugly watermarks or return a blurry mess. You absolutely must invest in dedicated desktop software or premium, reputable cloud services.
5. Upscaling Already Massive Resolutions Unnecessarily
Sometimes, creators get entirely too greedy with their numbers. They might start with a file that is already 4000 pixels wide, and they decide to push it to 16000 pixels just for fun. This is a massive waste of computer resources and often damages the art.
Trying to force unnecessary file upgrades is just like poorly managing unnecessary financial debt burdens; it creates huge problems you never needed to have. If the file is already highly detailed, forcing it through intense algorithms will over-process the lines. This creates jagged, harsh edges that actually hurt the eyes when printed. Only use these powerful tools when your starting resolution is truly restricting your creative goals.
Transform Your Creative Workflow Starting Today
You now possess the exact, step-by-step knowledge required to never worry about blurry, unusable files ever again. You fully understand the deep science of how pixels interact and why the old, standard resizing methods completely fail. You have learned how to prepare your base files beautifully and choose the perfect mathematical engine for your unique artistic style.
By combining the power of incremental scaling with smart texture blending and selective masking, you can now produce stunning artwork. Your new files will easily compete with the highest-end professional design studios in the world. You are no longer just guessing; you are working with true professional intent.
Do not let frustrating technical limitations hold your amazing creativity back for another single minute. I want you to take one of your absolute favorite, low-quality creations today and apply these exact steps immediately. Open your software, clean the base file, and gently push that enhancement slider up.
Watch very closely as the messy, frustrating blur magically transforms into breathtaking, crisp detail right before your eyes. You finally have the ultimate power to control your digital environment completely. Go start practicing these proven methods right now, and confidently share your absolute best, high-definition work with the world.
Seeing my own blurry digital art turn into crystal-clear, print-ready masterpieces completely changed my confidence as a creator. You already have the amazing ideas in your head, so do not let a few bad pixels stop you from showing them off. Grab your favorite low-quality image right now, try just one of these steps, and watch the magic happen!
Disclaimer: The methods and software tricks shared in this article about upscaling low-resolution AI images are based on my personal experience as a digital creator. Software updates happen often and results can vary depending on your starting image, so always remember to save a backup copy of your original file before applying any heavy edits.