The Frustrating Reality of Disappointing Graphics
I still clearly remember the day I brought my brand-new, highly anticipated next-gen console home. I carefully unboxed it, plugged the HDMI cable into my massive living room TV, and sat back on the couch with a huge smile on my face. I was fully expecting to see mind-blowing, lifelike graphics that would make my jaw drop. Instead, the game loaded up, and my heart sank entirely.
The shadows looked like thick, muddy gray blocks, and the bright skies in the game completely blinded me without showing any actual cloud details. Worse than the bad colors was the terrible feeling of pressing the jump button and watching my character react a half-second too late. I thought I had wasted my hard-earned money on a broken machine. It took me a long time to realize that my console was perfectly fine. The real enemy was simply my television's factory default settings.
Every single day, thousands of gamers sit down to relax, completely unaware that they are only getting half the experience they paid for. You buy these incredibly powerful machines designed to output stunning visuals, but the screen you play on is holding everything back. Factory default TV settings are meant to look good on a brightly lit electronics store shelf, not in your cozy gaming room.
Because of this, players constantly suffer from eye strain after just an hour of playing. Dark horror games become unplayable because the black colors look like a glowing, milky white fog. Competitive multiplayer matches become incredibly frustrating when you get shot by an enemy you could not even see clearly.
The worst part is the hidden input delay. You press the trigger to shoot, and your television takes a fraction of a second to process the image before showing it. That tiny delay is enough to ruin your aiming, make you fail a simple jump, and completely destroy your mental peace during a gaming session. You start blaming your own skills, completely unaware that your display is actively working against you.
We deserve to experience these digital worlds exactly the way the game developers intended. You should not have to squint at your screen to read small text or feel a headache coming on because the colors are artificially pumped up to extreme levels. Fixing this does not require a degree in engineering or expensive professional equipment. It just requires understanding what a few simple sliders actually do to your screen.
Breaking Down the Visual Magic: Your Action Plan
Taking control of your gaming display is much easier than you might think. We are going to walk through the exact steps needed to transform your screen from a dull, sluggish mess into a highly responsive, beautiful window into other worlds. Let us tackle this systematically, starting with the biggest offender first.
Unlocking Pure Speed: The Magic of Game Mode
If you only change one setting on your television today, this must be the one. Modern televisions are incredibly smart, almost acting like full computers built just for video processing. When you watch a movie, the TV applies dozens of hidden filters to make the motion smoother, reduce digital noise, and boost the colors.
All of that extra processing takes time. While a half-second delay does not matter when you are watching a cooking show, it is absolute poison for video games. This delay is known as "input lag." It is the exact amount of time it takes for your button press to actually translate into action on the glass screen.
Game Mode is your best friend here. By activating Game Mode in your picture settings, you are essentially telling your TV to stop thinking so hard. You force the screen to bypass all those heavy cinematic processing filters. The image travels from your console straight to the screen as fast as physically possible.
Suddenly, driving a car in a racing game feels incredibly tight and responsive. Aiming a weapon feels like a direct extension of your own hand. You might notice that the picture looks a tiny bit less smooth when you first turn this mode on. Do not worry about this at all, as we are going to fix the colors and contrast in the very next steps.
Finding the Perfect Balance: Brightness and Contrast
Now that your controls are fast, we need to fix the actual light coming from the screen. Most people completely misunderstand what the brightness and contrast sliders actually do. Let us use a very simple analogy to make this crystal clear.
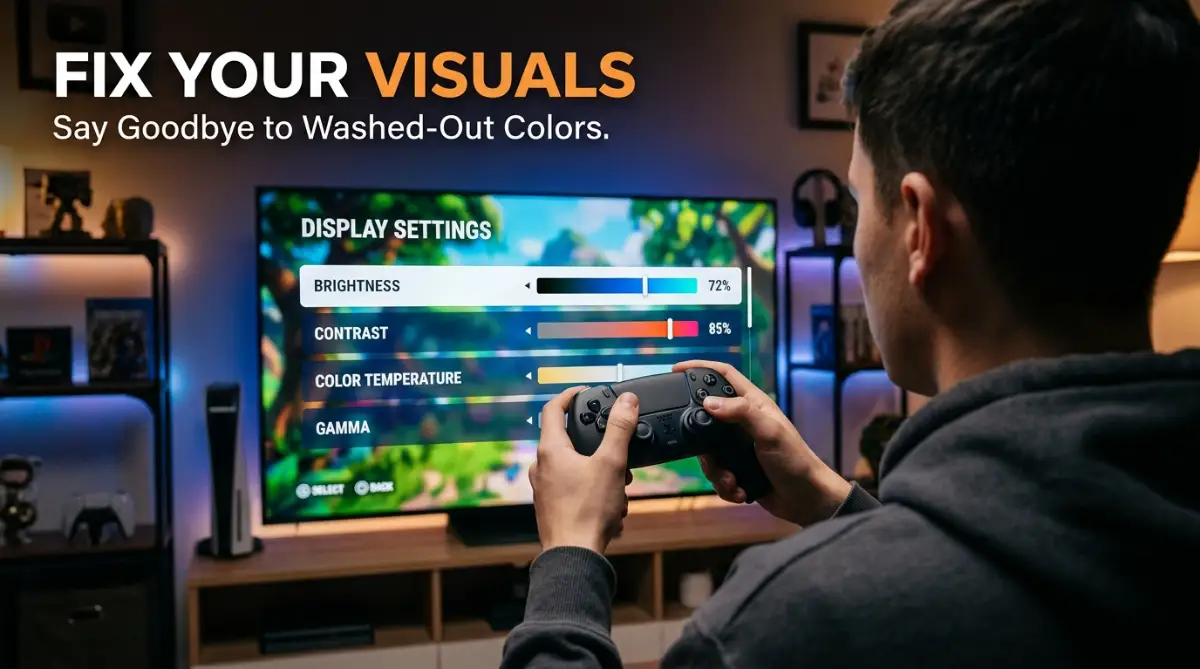
Think of Brightness as the controller for your shadows and dark areas. If your brightness is set too high, your deep blacks will look like washed-out gray, making the game look foggy. If it is too low, the dark corners of the room will crush into solid black blocks, hiding enemies and important items.
Contrast, on the other hand, controls the brightest parts of your image. If your contrast is cranked up to the maximum, bright objects like the sun or white clouds will lose all their detail. They will just look like glowing white blobs on your screen. You want to find the sweet spot where a white piece of paper in a game looks white, but you can still see the texture on it.
To dial this in perfectly, load up a game that has both very dark areas and bright lights. Find a dark corner in the game and slowly lower your brightness slider. Stop exactly when the darkest shadows look truly black, but you can still see the details of the brick or dirt on the ground. Then, look up at the sky or a bright lamp, and adjust the contrast until the light looks natural without blinding you.
Stopping the Artificial Glow: Fixing Your Sharpness
This is where almost every single new gamer makes a massive mistake. When you look at the TV menu and see a setting called "Sharpness," your brain immediately thinks you need it. You want your next-gen games to look sharp, right? So, you crank that slider all the way up to a hundred.
This is exactly what you should never do. In modern digital displays, the sharpness slider does not actually add any real detail to the picture. Instead, it creates an artificial, bright halo effect around the edges of every single object on the screen. It is essentially a digital trick designed to make low-quality cable television look better.
When you apply artificial sharpness to a high-quality console game, it ruins the artwork. Tree leaves will look jagged and noisy. Character faces will look harsh and deeply unnatural. Text on the screen might even start to shimmer or glow in a weird way.
I personally ruined my first playthrough of a beautiful fantasy game by keeping my sharpness at maximum. The grass looked like glowing green needles, and I completely missed the soft, natural art style the developers worked so hard to create.
For almost all modern gaming displays, you want to turn the Sharpness slider down completely to zero. Some specific brands of televisions require the sharpness to be exactly at the halfway mark to remain neutral. Check your specific manual, but remember that lower is almost always better. Your console is already sending a perfectly sharp, high-definition image directly through the HDMI cable.
Mastering High Dynamic Range (HDR) Setup
If you have bought a television recently, you have definitely seen the term HDR plastered all over the box. HDR stands for High Dynamic Range, and it is arguably the biggest leap in visual quality since we moved from standard definition to high definition. However, it is also the most confusing feature to get right.
Standard displays can only show a limited range of light and dark colors. HDR completely blows the doors off those limitations. It allows the sun in the game to shine with intense, realistic brightness while keeping the shadows deep, rich, and full of hidden details.
Want to truly understand how much HDR changes your gaming experience? Check out this incredibly helpful visual breakdown below.
The biggest mistake gamers make is assuming HDR works perfectly the moment you turn it on. That is a myth. Every single screen handles HDR differently, and your console needs to know exactly how bright and how dark your specific screen can get.
First, ensure that your television's HDMI ports are set to receive the highest bandwidth possible. This setting is usually hidden in the TV menus under names like "Enhanced Format," "HDMI Deep Color," or "Input Signal Plus." If this is off, your console cannot send the full HDR signal to the screen.
Once that is enabled, go directly into your console’s internal system settings. Both major next-gen systems have a dedicated HDR calibration app built right into the main menu. This app will ask you to adjust a series of white and black boxes until they become completely invisible.
Do not guess during this process. Follow the on-screen instructions perfectly. Make sure the room lighting matches your normal gaming environment when you do this. If you play mostly at night in the dark, calibrate the console in the dark.
Taming the Colors: Warm vs Cool Tones
Have you ever noticed that the games at the electronics store look incredibly blue and aggressively vibrant? This is a sales tactic known as "store mode." Retailers pump up the cool blue tones because human eyes are naturally drawn to bright, icy white light from a distance.
When you bring that display home, that blue tint destroys the natural look of your games. Snow will look like blue plastic, and human skin tones will make characters look like they are freezing to death. We need to bring the color temperature back to reality.
Dive into your picture settings and look for the "Color Temperature" or "White Balance" option. You will usually see choices like Cool, Standard, Warm 1, and Warm 2. I highly recommend switching this setting to Warm 1 or Warm 2.
At first, your screen is going to look a little bit yellow or orange to you. Your eyes have been trained for years to accept blue-tinted screens as normal. Give it about thirty minutes of gameplay. Soon, you will realize that dirt looks like real dirt, sunlight looks like golden real sunlight, and characters look like real living people.
A Quick Reference Comparison
To make things incredibly easy to remember, here is a quick breakdown of what you should be aiming for when tweaking your settings.
Pro-Level Secrets for a Jaw-Dropping Visual Experience
Now that we have covered the absolute basics, we can start pushing your setup to its absolute limits. You want your screen to look so good that your friends actually stop and stare when they walk into your living room. Achieving that wow factor requires diving into some slightly hidden menus.
One of the biggest secrets in the display community is managing something called the RGB Range. This is a quiet conversation happening directly between your console and your television. Your gaming machine sends out a specific range of colors, and your screen needs to know exactly how to interpret them.
If your console is sending a "Full" signal but your television is expecting a "Limited" signal, your screen will look completely broken. The deep, scary shadows in your favorite horror game will instantly turn into a milky, washed-out gray fog. On the flip side, if the settings are reversed, the dark areas will become solid black blocks, completely hiding everything inside them.
You need to make sure both machines are speaking the exact same language. I highly recommend diving into your console settings and leaving the RGB Range on "Automatic." If you still notice weird, glowing gray shadows, manually set both your console and your television to "Limited" and see if that fixes the black levels instantly.
Mastering Your Room Lighting
Most people completely ignore the physical environment around their television. You can have the most expensive screen in the world, but if the lighting in your room is terrible, your games will look incredibly flat. Staring at a massive, bright square of flashing lights in a pitch-black room is also a recipe for massive headaches.
This happens because your eyes are constantly struggling to adjust between the blinding screen and the dark walls behind it. To fix this, you should seriously consider adding bias lighting. These are simple, soft LED light strips that you attach directly to the back of your television.
When this soft light bounces off the wall behind your screen, it gently tricks your eyes. It makes the black colors on your screen look significantly deeper and richer than they actually are. More importantly, using proper ambient bias lighting reduces digital eye fatigue drastically, allowing you to play longer without feeling tired.
Syncing Everything Perfectly
When you start adjusting heavy visual settings, you might accidentally introduce some strange glitches into your setup. Sometimes, forcing the screen to process beautiful high-definition colors can cause your audio and your video to fall out of sync. You might shoot a weapon on screen, but hear the gunshot a split second later.
This happens because the television is spending too much time drawing the picture, leaving the sound system behind. If you ever run into this exact issue, managing your internal settings is your best defense. Just like you might need to understand how to fix audio delay in VR games, fixing console audio delay requires turning on a feature called "Audio Pass-Through" in your television menu.
Another major pro-tip involves keeping your equipment firmware completely updated. We often update our gaming systems the moment we turn them on, but we completely forget that smart televisions need updates too. Manufacturers frequently release hidden software patches that fix weird color bugs or improve input response times.
You should connect your television to your home internet at least once a month to check for these quiet updates. Skipping these patches can lead to weird handshake issues between your devices. It is very similar to how ignoring software updates means your VR headset keeps disconnecting from your PC randomly during intense sessions.
The Magic of Variable Refresh Rate
If your display supports a feature called Variable Refresh Rate (VRR), you absolutely need to turn it on immediately. In older generations, if a game struggled to keep up with intense explosions, the screen would literally tear in half horizontally for a split second. It was incredibly ugly and distracting.
VRR completely eliminates this problem by forcing the television to listen directly to the console. If the console suddenly slows down to process a massive explosion, the television slows its own refresh rate down to match it perfectly. The result is a buttery smooth visual experience, even when the machine is struggling internally.
The Biggest Traps That Destroy Your Picture Quality
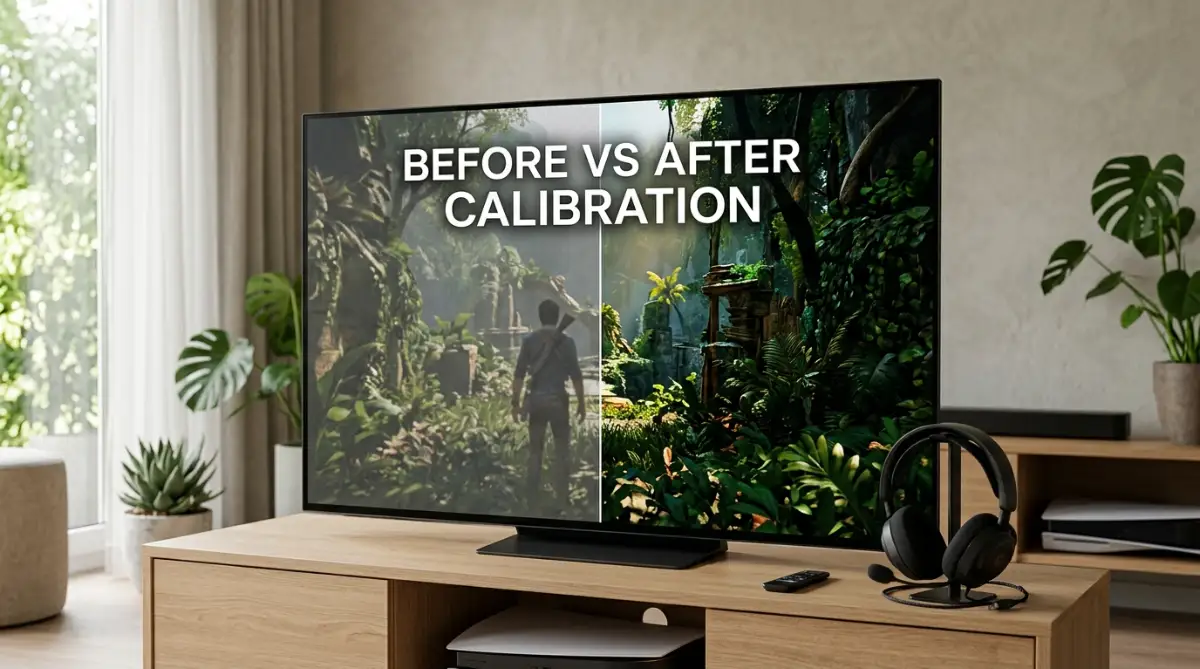
We have talked a lot about what you should do, but we need to have a serious conversation about what you should never do. So many passionate gamers completely ruin their expensive setups by falling into a few very common traps. Let us walk through these pitfalls so you can avoid them entirely.
The Nightmare of Dynamic Contrast
This is arguably the most destructive setting on any modern television, yet it is almost always turned on by default out of the box. Dynamic Contrast tries to act like a smart robot that constantly analyzes your screen. It aggressively brightens light areas and crushes dark areas on the fly, depending on what is happening in the scene.
Imagine trying to read a great book while someone is constantly turning a dimmer switch up and down every few seconds. That is exactly what Dynamic Contrast does to your gaming artwork. It completely destroys the natural, intended lighting that the original developers spent thousands of hours creating.
When you walk from a bright outdoor area into a dark cave in your game, you want the transition to feel natural and scary. Dynamic Contrast will panic and artificially flood the cave with fake light, completely ruining the mood. Go into your advanced picture settings right now and turn this feature completely off.
Using the Wrong Hardware Ports
This mistake breaks my heart every time I see it because the fix is so incredibly simple. Most modern televisions have four different HDMI ports on the back. A massive amount of people assume that all four ports are exactly the same.
In reality, most manufacturers only make one or two of those ports capable of handling the massive data loads required by modern consoles. If you plug your powerful new machine into HDMI Port 3 instead of HDMI Port 1, you might be accidentally restricting your data speed. You could be missing out on higher frame rates or better colors entirely.
Always check your specific manual to see which ports support the highest speeds. The official standards for modern high-speed HDMI connections require massive bandwidth to push highly detailed 4K images smoothly. Do not choke your expensive gaming machine by plugging it into a cheap, low-bandwidth port meant for an old DVD player.
Ignoring Basic Physical Maintenance
We spend hours tweaking sliders and adjusting digital numbers, but we forget about the physical glass right in front of us. Dust, fingerprints, and random smudges completely destroy the sharp clarity of a high-definition screen. A dirty screen scatters the light coming from the pixels, making your game look strangely blurry or greasy.
I see people wiping their expensive screens with rough paper towels and harsh chemical window cleaners. This strips away the protective anti-glare coating on the glass, permanently ruining the television. Just like you need to safely clean your sensitive VR lenses with a gentle microfiber cloth, you must treat your gaming television with the exact same level of respect.
The Vivid Mode Illusion
Store displays are designed to catch your attention from fifty feet away in a brightly lit warehouse. To achieve this, retailers turn on something called "Vivid Mode" or "Sports Mode." This setting aggressively over-saturates every single color until they practically glow in the dark.
When you use Vivid Mode in a normal living room, green grass looks like neon toxic waste, and a blue sky looks like bright blue plastic. It strains your eyes incredibly fast and makes everything look like a cheap cartoon. Always stick to Game Mode or a standard movie profile to keep your colors looking grounded and realistic.
Claiming Your Ultimate Visual Setup
Taking control of your entertainment setup is an incredibly rewarding process. You no longer have to settle for the blurry, delayed, and washed-out factory settings that the manufacturer forced onto your screen. By making just a handful of very specific adjustments, you have completely transformed your digital experience.
Think of this process like tuning an expensive musical instrument before a big concert. You would never just pull a guitar out of a box and expect it to sound perfect immediately. Just as you must always calibrate your drone compass before taking your first flight, you must teach your television how to properly display your specific gaming worlds.
Do not be afraid to trust your own eyes moving forward. The rules we discussed today are a fantastic foundation, but your personal preference always wins in the end. If you want your colors to pop just a tiny bit more, bump up the color slider gently until you smile.
You are now equipped with the exact knowledge needed to maximize your hard-earned hardware. No more guessing, no more squinting, and no more blaming the television when you miss an important jump. You have officially unlocked the true power of your system.
I still remember the first time I properly tweaked my own display and saw those deep, terrifying shadows in my favorite horror game. My hope is that you experience that exact same jaw-dropping moment tonight when you boot up your system. You have all the tools you need now, so go turn on that television and see what you have been missing!
Common Questions About Display Adjustments
Do I absolutely need a 4K resolution screen to enjoy modern games?
Not necessarily, but it definitely provides a massive visual upgrade. While standard 1080p screens still play modern titles perfectly well, they miss out on the tiny environmental details that developers hide in the background. Upgrading to a higher resolution makes every single leaf on a tree and texture on a wall look incredibly lifelike.
Why does the camera movement look so blurry when I look around fast?
This usually happens because motion smoothing features are still turned on inside your television menus. These features try to insert fake frames between your actual gaming frames, causing a massive, ugly smear effect when you move the camera. Turning on your dedicated Game Mode usually shuts this fake smoothing off instantly, making your camera movements look sharp again.
Can using High Dynamic Range (HDR) cause extra input delay?
On older televisions from a few years ago, turning on this feature sometimes added a tiny bit of noticeable lag because the internal processor was struggling. However, almost all modern gaming televisions can handle these rich colors without adding any extra delay whatsoever. If your screen is relatively new, you can safely turn this beautiful feature on without worrying about slowing down your reflexes.
Should I change my settings depending on the specific game I play?
For the most part, you can set your foundation once and leave it alone for almost everything you play. However, you might want to slightly raise your brightness slider when switching from a bright, colorful platformer to a very dark, moody horror title. Most titles actually have an internal brightness slider in their own pause menu, so you can easily make quick tweaks without ever touching your television remote again.
You will often see gamers online begging for the "exact numbers" to put into their TV settings. They want a magic list of numbers they can just copy and paste to get the perfect picture. This is a massive myth that needs to be ignored completely.
Even if you and your best friend buy the exact same model of television on the exact same day, your screens will look slightly different. Manufacturing panels always have tiny variations. More importantly, your gaming environment is entirely unique to your home.
The sunlight coming through your living room window drastically changes how your screen looks. A dark basement gaming setup requires completely different brightness settings than a bright, sunny bedroom. You have to trust your own eyes rather than blindly following a list of numbers from the internet.
Use the rules we just discussed as your foundation. Set up your Game Mode, drop the sharpness, and fix the color temperature first. Then, load up your absolute favorite game. Walk around a familiar area in the game and make tiny, slow adjustments to the brightness and contrast until the world looks exactly how you want it to feel.
Disclaimer: The information provided in this article is for educational and informational purposes only. Modifying advanced television or console settings is done at your own risk. Always consult the official user manual provided by your equipment manufacturer before making significant changes to firmware, system preferences, or hardware connections. We are not responsible for any unexpected visual issues or hardware malfunctions that may occur.