The Hidden Frustration of Cloudy, Scratched VR Lenses
You just put on your favorite virtual reality headset, ready to dive into a whole new universe. But instead of seeing a crisp, beautiful digital world, everything looks slightly blurry.
You notice annoying smudges and weird glares catching the light. It completely breaks your immersion.
I still remember the exact moment I ruined my very first VR headset just three days after buying it. I noticed a tiny smudge, grabbed the edge of my cotton t-shirt, and gave the screen a quick wipe. That single, careless rub left a nasty, permanent scratch right in the middle of my view. It was a painful and expensive lesson that made me completely obsessed with finding the safest way to care for these delicate lenses.
Like many gamers, you probably grab the nearest t-shirt or paper towel to give those lenses a quick wipe. Stop right there.
That simple, innocent action is exactly how thousands of people permanently ruin their expensive gaming equipment every single day. The lenses inside your headset are incredibly sensitive. They are not made of hard glass like traditional windows.
Instead, most modern headsets use soft polycarbonate materials or custom resin. These materials are highly prone to micro-scratches. According to experts on proper optical lens maintenance, rubbing a dry, rough cloth over a delicate surface is the fastest way to cause permanent damage.
When you get bad advice online, the problem only gets worse. Many casual forums suggest using window cleaners, alcohol wipes, or rough fabrics.
Here is why relying on that bad information hurts you:
- Permanent Fog: Chemical cleaners easily strip away the delicate anti-glare and anti-fog coatings on your screens.
- Micro-Scratches: Using your shirt traps microscopic dirt, turning your clothing into literal sandpaper against the soft plastic.
- Wasted Money: Once the lenses are scratched, you usually cannot replace just the glass. You have to buy an entirely new headset.
- Lost Immersion: Scratches cause light rays to bend weirdly, creating a horrible "god ray" effect that ruins dark gaming scenes.
When you ruin your gear, it heavily drains your mental peace. Just like figuring out how to diagnose and fix overheating issues in high-performance laptops, keeping your gaming tech safe requires proper knowledge.
A damaged headset constantly reminds you of a silly mistake every time you try to play. It kills your confidence in handling high-end gadgets.
Here is how poor maintenance directly impacts your daily life:
- Eye Strain and Headaches: Your brain works twice as hard to focus through blurred, scratched plastic, leading to massive headaches.
- Frustration During Gameplay: You miss important visual cues in competitive games because a scratch blurred your vision.
- Stress Over Money: Knowing you accidentally damaged a highly expensive device creates unnecessary daily anxiety.
We need to fix this problem right now. I am going to show you the exact, completely safe method to maintain your gear so it always looks brand new.
The Professional Strategy for Crystal-Clear Lenses
If you want to see these exact cleaning steps in action, check out this quick video to watch how I safely maintain my own gear. Once you finish watching, keep reading below to discover the sneaky way your everyday cleaning habits might actually be melting your screen's protective coating!
Step 1: Evicting Dust the Safe Way
Before anything ever touches the surface of your screen, you absolutely must remove loose dust. This is the golden rule of handling any optical device.
Think of dust particles as tiny, jagged little rocks. If you press a cloth directly onto those rocks and drag them around, you will carve tiny trenches into the plastic.
This basic principle applies to all high-end optical gear. For example, if you want to master your photography drone calibration, you must keep the camera sensors completely free of abrasive dust before making adjustments.
So, how do you remove the dust safely? Do not use your mouth to blow on it.
When you blow air from your mouth, tiny droplets of spit land on the screen. Saliva contains enzymes and acids that can degrade protective coatings over time. Plus, it leaves dried water spots that are annoying to buff out later.
Do not use canned compressed air, either. Compressed air cans contain chemical propellants.
If you tilt the can even slightly, an icy burst of freezing liquid shoots out. This freezing liquid can easily crack the sensitive resin or destroy the edges of the display inside the unit.
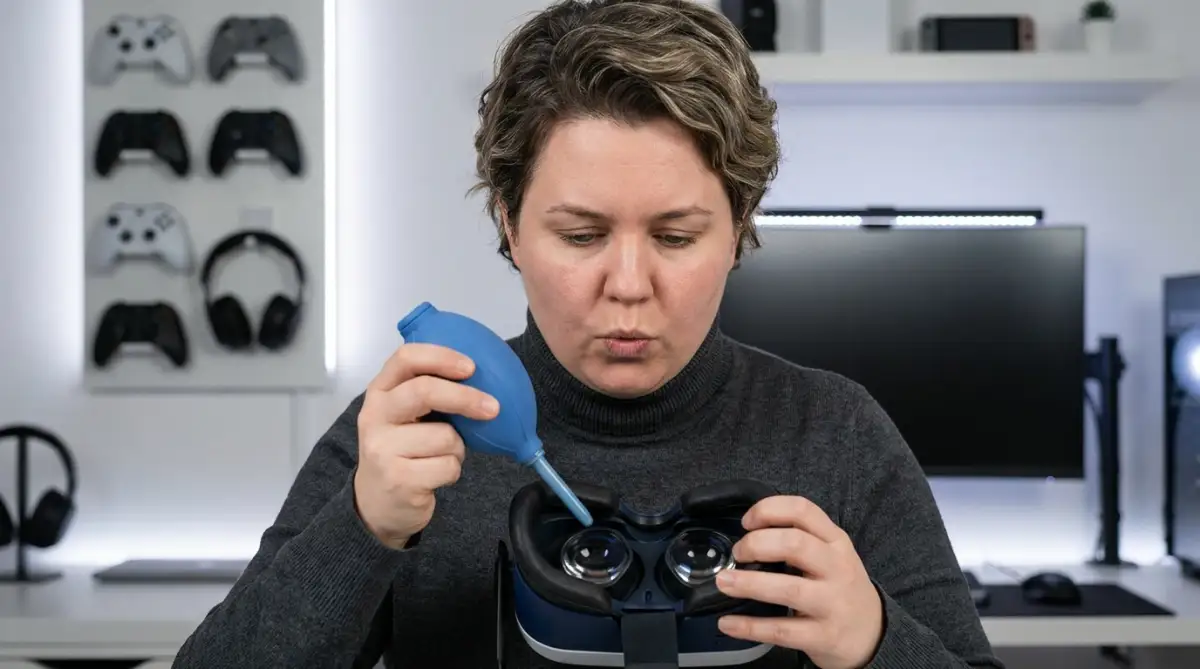
The smartest tool you can buy is a simple silicone bulb air blower. These are cheap, completely manual, and incredibly safe.
You just squeeze the bulb, and it pushes a gentle stream of clean, dry air across the surface. Tilt your headset downward so gravity helps pull the dust away as you puff the air over it.
Make sure you get into the edges where the plastic meets the fabric housing. Dust loves to hide in those deep corners.
Step 2: Choosing the Right Microfiber Champion
Now that the loose dust is gone, we can deal with the oily smudges. Human skin naturally produces oils, and your eyelashes easily transfer these oils onto the glass when you play intense games.
To remove these oils without causing scratches, you need a high-quality microfiber cloth. However, not all microfiber cloths are created equal.
Those cheap, fluffy towels you use to dry your car? Keep those far away from your gaming gear. They easily trap hard dirt particles deep within their thick fibers.
You need a premium, tightly woven optical microfiber cloth. These are the smooth, silky ones that usually come inside the case when you buy a new pair of prescription glasses.
If you are a content creator, you already know how bad visuals hurt your brand. Much like understanding how bad video editing is secretly killing your YouTube money, ignoring small visual details on your headset will ruin your recording experience.
The science behind optical microfiber is fascinating. The fibers are split incredibly thin—much thinner than a human hair.
Because they are so incredibly tiny, they naturally attract and trap oils without needing any chemical sprays. They lift the grease off the surface rather than just smearing it around like a regular tissue would.
When using the cloth, never press down hard. Use zero pressure.
Let the weight of your fingers do the work. Start directly in the center of the lens.
Gently wipe in a circular motion, moving slowly from the center toward the outside edges. This specific motion pushes any remaining tiny particles away from your direct line of sight.
A huge mistake I used to make was tossing my microfiber cloth directly onto my desk, where it secretly collected hard dust particles. Now, I always keep my optical cloth sealed inside a small ziplock bag right next to my gaming station. Trust me, taking two seconds to store your cloth properly will save you from rubbing hidden dirt directly into your expensive screens.
Step 3: Managing Stubborn Smudges Without Chemicals
Sometimes, dry wiping just does not get the job done. Maybe you played an intense fitness game, sweated heavily, and let the sweat dry onto the screen overnight.
Your first instinct might be to grab a wet wipe or some rubbing alcohol. Please, never do this.
Virtual reality manufacturers specifically warn against using any liquid cleaners or alcohol-based solutions. Major tech sites reporting on safe gaming hardware maintenance strongly agree that alcohol will permanently melt the anti-glare coating.
Once that coating melts, you will see a permanent cloudy haze that no amount of wiping can fix. So, what is the safe alternative?
Just use a tiny bit of plain moisture from your breath. Open your mouth and gently breathe a light puff of warm air onto the smudge, just like you would with a pair of sunglasses.
The slight condensation from your breath is 100% pure water vapor. It is just enough moisture to soften the dried sweat without introducing harsh chemicals.
Immediately after breathing on it, use your clean optical microfiber cloth to gently buff it out in a circular motion. If the smudge is really bad, you can put a single drop of distilled water directly onto a small corner of your cloth.
Never drop water directly onto the headset itself. Liquid can easily seep under the plastic rings and fry the electronic display underneath.
Always apply the moisture to the cloth first. Gently wipe the stubborn area, and then use the dry side of the cloth to buff away any remaining streaks.
By following these three exact steps, you ensure your expensive equipment remains in flawless, out-of-the-box condition for a very long time.
Step 4: The Art of Cloth Maintenance
Many people follow all the correct wiping steps but still end up scratching their displays. Why does this happen?
The secret enemy is a dirty microfiber cloth. A microfiber cloth is designed to grab and hold onto dirt, oils, and abrasive dust.
If you use the same unwashed cloth for six months, it becomes completely loaded with invisible, hard debris. When you rub that dirty cloth on your headset, it acts just like fine-grit sandpaper.
You must keep your cleaning tools as spotless as the tech you are trying to protect. Wash your optical cloths regularly, but you must follow specific rules to keep them effective.
Never put your microfiber cloths in the washing machine with your regular clothes. Normal laundry detergents often contain heavy perfumes, fabric softeners, and harsh chemicals.
Fabric softener is the ultimate enemy of microfiber. It coats the tiny fibers in a waxy layer, completely destroying their ability to absorb oils.
Instead, wash your cloths by hand in the sink. Use a few drops of plain, mild dish soap and warm water.
Gently massage the cloth to release the trapped skin oils and dust. Rinse it extremely thoroughly until the water runs completely clear.
Finally, let it air dry naturally by hanging it up in a clean room. Never put it in the hot dryer, as the intense heat will permanently melt the synthetic fibers.
Step 5: Environmental Protection and Smart Storage
Cleaning your tech safely is only half the battle. Preventing the mess from happening in the first place saves you time and reduces the risk of accidental damage.
Think about how much effort goes into creating perfect digital worlds. When creators generate high-quality conceptual art using AI, they want you to see every single pixel clearly.
If your equipment is constantly covered in dust from your bedroom, you are missing out on that incredible detail. The best way to reduce dust buildup is to store your headset properly when you are not playing.
Never leave your headset sitting openly on your desk with the lenses facing upward. That is practically an open invitation for dust, pet hair, and airborne grease to settle right onto the most sensitive parts.
Invest in a solid storage case, or simply put the headset back into its original retail box. If you prefer to keep it on a display stand, buy a cheap lens cover.
A simple fabric or silicone lens cover blocks dust entirely. It also protects your gear from the absolute worst danger of all: direct sunlight.
If sunlight hits your lenses, they act like magnifying glasses. In less than a minute, the focused sun rays will permanently burn dead pixels into your inner screens, completely destroying the device.
A lens cover protects against dust and sun damage at the same time. This one small habit will drastically reduce how often you actually need to wipe the glass.

Dangerous Pitfalls You Must Avoid at All Costs
Even smart people make silly mistakes when they are in a rush. If you want your expensive gear to last, you must completely eliminate these common bad habits.
These are the five biggest traps people fall into, and why they are so dangerous:
1. Using Paper Towels or Tissues
Paper products feel soft to your hands, but they are literally made from crushed wood pulp. Under a microscope, paper fibers are hard and jagged. Wiping a screen with a tissue will leave hundreds of microscopic scratches instantly.
2. Wearing Glasses Without Spacers
If you wear prescription eyeglasses while gaming, your hard glass lenses will easily rub against the soft plastic of the headset. This friction causes severe scuffing on both items. Always use the glasses spacer that came with your box, or buy custom prescription inserts.
3. Using Household Window Cleaners
Spraying Windex or similar glass cleaners is a terrible idea. These products contain ammonia and harsh solvents designed for tough home windows. They will instantly strip the anti-glare and UV protective layers right off your gaming gear.
4. Wiping in Straight, Aggressive Lines
When people are in a hurry, they usually scrub back and forth really hard. If there is a single piece of hard sand on the surface, scrubbing in a straight line drags it across the entire screen, leaving a long, highly visible scratch. Always use gentle, circular motions.
5. Ignoring Sweat Buildup
After a heavy workout session in virtual reality, sweat drips down into the housing. If you leave it there, the salt from your sweat will dry and crystallize on the edges of the display. Always gently pat the moisture dry with a clean towel before putting the device away.
If you ignore these warnings, you risk ruining a device that costs hundreds of dollars. The damage happens in seconds, but the regret lasts until you buy a new one.
Keep Your Virtual Worlds Looking Beautiful
Taking care of your gaming equipment does not have to be stressful or overly complicated. Once you build the right habits, the whole process takes less than thirty seconds before you start playing.
You invested good money to experience breathtaking digital environments. You deserve to see those worlds exactly as the developers intended—crisp, clear, and perfectly vibrant.
Just remember the golden rules. Always blow the dust away first. Never use harsh chemicals or wet wipes. Rely on a clean, premium optical microfiber cloth for everything else.
When you treat your gear with respect, it will reward you with thousands of hours of flawless entertainment. You will never have to squint through an annoying, blurry smudge ever again.
Grab your silicone air blower, wash your microfiber cloth, and get your setup ready. Your next amazing gaming session is waiting for you, and now you can see it clearer than ever before!
Ever since I started following these simple cleaning habits, my headset has stayed completely scratch-free and looks brand new. Do not wait until you accidentally ruin your gear to start taking this seriously. Set up your safe cleaning kit today, and get ready to enjoy your favorite digital worlds exactly how they were meant to be seen!
Disclaimer: The tips and methods shared in this article are based on personal experience and general best practices for optical maintenance. Since different VR brands use slightly different lens materials, always double-check the official instruction manual that came with your specific headset to make sure you do not accidentally void your warranty.