The Agony of Lag: When Virtual Reality Turns Into a Nightmare
Imagine this scenario. You finally put on your headset after a long, exhausting day. You boot up your favorite game, entirely ready to escape into another universe.
A few months ago, I was super excited to show off my new VR setup to my friends, but the screen kept jittering like crazy. Within five minutes, I felt so dizzy that I had to lie down on the living room floor with a pounding headache. I was honestly so embarrassed and genuinely felt like I had thrown hundreds of dollars down the drain on a broken setup.
But the very moment you turn your head, the screen jitters violently. The frame rate drops off a cliff. Suddenly, that beautiful immersive world feels like a broken, messy slideshow.
Your stomach instantly starts to churn. Motion sickness kicks in hard and fast. Instead of enjoying an epic gaming session, you are forced to rip the headset off, feeling dizzy and completely frustrated.
This happens way too often to PC gamers. Virtual reality is supposed to feel real, but absolutely nothing breaks that illusion faster than a stuttering screen.
Finding a real, working solution often feels like navigating a maze blindfolded. You search online for answers, but the advice you get usually makes things much worse.
- You change a dozen random settings in your graphics control panel, only to realize the lag is now twice as bad.
- Tech forums give you highly conflicting advice, telling you to buy expensive new cables when your current one is perfectly fine.
- Outdated online guides suggest turning off essential background apps, which ends up crashing your Windows system completely.
- Random people on the internet blame your specific graphics card, tricking you into thinking you need a massive upgrade you cannot afford.
This constant, daily battle with poor performance does much more than just ruin a single game. It slowly destroys your natural excitement for the hobby.
- You feel anxious every single time you boot up a game, wondering if today is the day it finally works right.
- You stop inviting friends over to try your expensive setup because you are embarrassed by the terrible performance.
- That constant, lingering fear of motion sickness makes you hesitate to even put the headset on your head.
- You lose confidence in your tech skills, feeling like you wasted hundreds of dollars on a broken experience.
The heavy reality is that PC VR is incredibly demanding on your computer. It requires your machine to render two separate high-resolution images simultaneously at a perfectly consistent frame rate.
When it fails to do that, you experience that awful stuttering. But the problem is rarely just one single thing. It is usually a messy mix of hardware limits, software conflicts, and hidden settings most gamers never check.
I remember speaking to a fellow gamer who almost sold his entire computer rig. He spent weeks fighting with choppy frames in half of his games. He tried reinstalling Windows, bought a brand-new router, and even replaced his memory sticks.
Nothing he did worked. It turned out to be a single hidden setting inside his game overlay that was silently eating up all his processing power.
This happens because the VR ecosystem is very fragmented. You have different headsets, separate driver updates, and multiple platforms running at the exact same time. They often fight for your computer's resources.
When these systems clash, your frame rate suffers immensely. The good news? You do not have to be a computer engineer to fix this mess. By understanding how these systems talk to each other, you can eliminate the guesswork completely.
How to Diagnose and Destroy PC VR Stutter (The Practical Approach)
Before we start changing settings blindly, we need a solid plan. Fixing frame rate drops requires a logical step-by-step approach.
We need to figure out exactly what part of your computer is struggling. Is it the brain of your computer (the CPU), or the graphics muscle (the GPU)?
Let us walk through the exact steps you can take today to smooth out your gameplay.
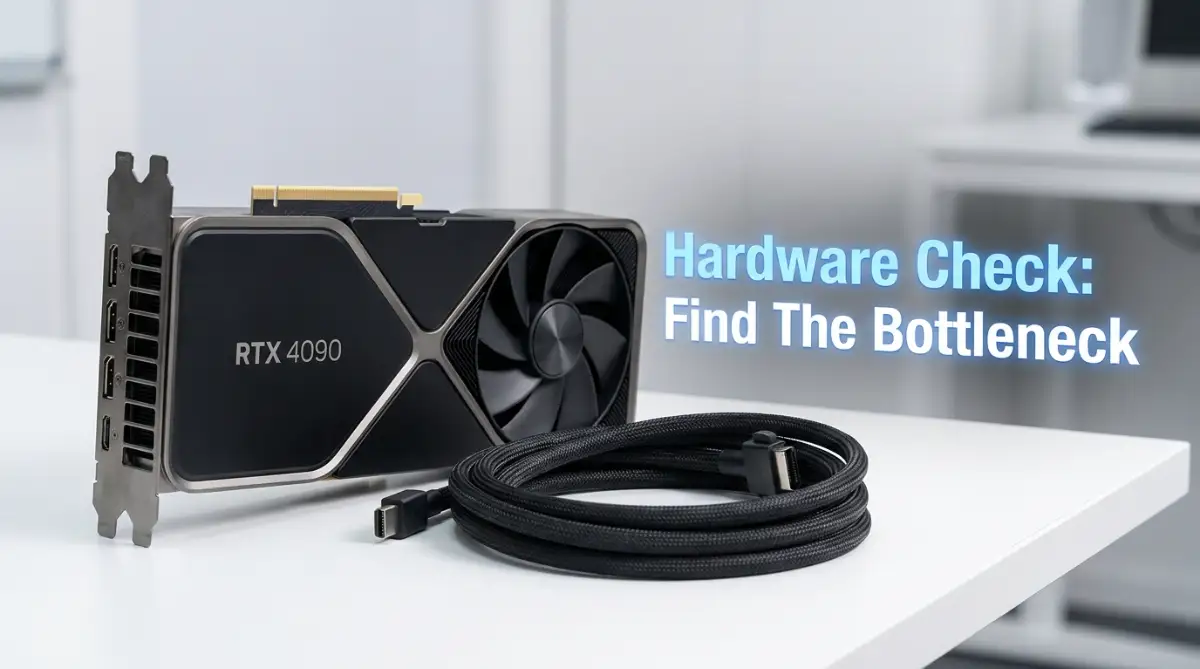
Step 1: Finding the Real Culprit (The Hardware Check)
Do not just guess what is causing your lag. You need to use proper monitoring tools to see what is happening behind the scenes.
Think of your computer like a busy shipping warehouse. The CPU is the warehouse manager, organizing all the boxes. The GPU is the delivery truck, taking those boxes to their destination.
If the manager is too slow, the truck sits empty. If the truck is too small, the boxes pile up at the door. Both situations will cause a massive delay in your game.
To see which part is failing, you need to check your Frame Timing. This tells you exactly how many milliseconds it takes your computer to create one single frame.
You can use software like fpsVR or the native SteamVR performance graph to watch these numbers. If you see your GPU graph turning red and spiking, your graphics card is overwhelmed. If the CPU graph spikes, your processor cannot keep up with the game logic.
If you want to see exactly how these performance graphs work in real time, check out this quick video walkthrough before jumping into the settings below!
Expert Insight:
Always test your performance while actually moving your head in the game. Standing completely still in a virtual menu will not show you the real performance drops.
Once you know which part is struggling, you know exactly where to focus your attention. You will not waste time changing graphics settings if your processor is actually the one causing the traffic jam.
Step 2: Taming the Software Beast (Background Conflicts)
Your computer runs dozens of invisible programs in the background. Many of these programs are incredibly selfish.
They will suddenly demand processor power while you are in the middle of a heavy gaming session. When this happens, your virtual reality game pauses for a split second to let the background app do its job. This creates what we call a "micro-stutter." It feels like a tiny hiccup every few seconds.
The most common offenders are RGB lighting software, heavy antivirus scans, and hardware monitoring tools. Ironically, the software you use to control your glowing computer fans might be ruining your gameplay.
Before you launch a heavy game, close unnecessary background apps completely. Check your system tray in the bottom right corner of your screen. Exit out of anything you do not actively need for your gaming session.
The Myth vs Reality of Process Priority
The Myth: Changing your game's process priority to "Realtime" in the Windows Task Manager will force your computer to give it all the power, fixing the lag.
The Reality: Doing this is highly dangerous for performance. Setting a game to "Realtime" starves your mouse, keyboard, and tracking sensors of essential power. Your headset will likely lose tracking entirely, making the game completely unplayable. Always leave process priority on "Normal" or "High" at most.
You should also check your web browser. Features like "Hardware Acceleration" in Chrome or Edge will reserve a piece of your graphics card for playing YouTube videos. If you leave your browser open while gaming, you are throwing away valuable graphics power.
Step 3: Managing the Cable and Bandwidth Bottleneck
How your headset talks to your computer is incredibly important. If you are using a wired connection, you are dealing with a massive amount of data flowing through one single cord.
Imagine trying to drink a very thick milkshake through a tiny, thin coffee straw. No matter how hard you pull, the milkshake barely comes out.
This is exactly what happens when you plug a high-speed headset into a slow USB 2.0 port. Your graphics card generates beautiful, smooth frames, but they get stuck in the cable.
You must ensure your headset is plugged directly into a USB 3.0 port or higher. These ports are usually blue or red on the back of your computer.
Always plug the cable directly into the motherboard. Front panel USB ports on your computer case are notoriously weak and often cause connection drops.
Quick Comparison: Wired vs Wireless Troubleshooting
1. Wired (Link Cable)
- Common Cause of Stutter: Slow USB port or worn-out cable bending.
- Immediate Practical Fix: Switch to a rear motherboard USB 3.0 port and check your cable for kinks.
2. Wireless (AirLink / VD)
- Common Cause of Stutter: Network congestion or 2.4GHz interference.
- Immediate Practical Fix: Connect your PC to the router via Ethernet and use a dedicated 5GHz Wi-Fi band.
If you play wirelessly, your network router is the new cable. If other people in your house are streaming movies in 4K, your router gets overwhelmed.
Your headset will struggle to catch the frames in time, causing heavy visual tearing and stuttering. Always hardwire your computer to your router using a physical Ethernet cable to fix this.
Step 4: The Danger of Auto-Resolution Settings
Many platforms, like SteamVR, try to be helpful by automatically setting your render resolution. This is a massive trap for many gamers.
The software looks at your graphics card and says, "Oh, you have a good card! Let me render this game at 150% resolution to make it look incredibly sharp." This process is called Super sampling. While it makes the game look breathtaking, it requires a massive amount of hidden processing power.
A user might boot up a simple game and wonder why it is lagging terribly. They do not realize SteamVR quietly forced their computer to render millions of extra pixels they never asked for.
You need to take manual control of this setting immediately. Open your SteamVR settings, go to the Video tab, and change the render resolution to "Custom."
Lock it at exactly 100%. This tells the software to render the game at your headset's native resolution, completely stopping the automatic pixel inflation. You will instantly notice a massive boost in your frame rate stability.
Pro Tip: I used to think my graphics card was simply too weak, and I almost wasted $500 buying a new GPU. Turns out, my biggest mistake was leaving my SteamVR render resolution on "Auto," which was silently choking my system. The day I manually locked it to 100%, my gameplay became buttery smooth without spending a single penny!
Step 5: Understanding the "Fake Frames" Phenomenon
Sometimes, your computer tries to save you from lag, but actually makes you feel worse. This happens due to a feature called Reprojection (or Asynchronous Spacewarp). When your computer fails to hit the target frame rate, it panics. If you need 90 frames per second, but your computer can only make 80, the system steps in to help.
It takes the last good frame, guesses where your head is moving next, and creates a "fake frame" to fill the gap. It artificially pushes the frame rate back up to 90. On paper, this sounds amazing. In reality, it causes strange visual glitches.
Straight lines will look wobbly. Fast-moving objects will leave blurry trails behind them. While it stops the game from freezing entirely, this "fake frame" feeling is highly uncomfortable for many people.
If you notice a sudden drop in visual quality followed by strange warping effects, Reprojection just kicked in. The only true way to stop this is to lower your in-game graphics settings until your computer can naturally hit the target frame rate without cheating.
Drop your shadow quality, lower the anti-aliasing, and turn off advanced particle effects. Your goal is raw, pure performance, not cinematic movie visuals. Smoothness will always feel better in virtual reality than shiny graphics.
Peeling Back the Layers: Advanced System Tweaks
Let us look deeper into the hidden settings of your gaming machine. When basic fixes fail, we need to examine how Windows handles your specific graphics hardware. Sometimes, the operating system itself gets confused while running heavy virtual reality software.
Have you ever heard of Hardware-Accelerated GPU Scheduling? We often call it HAGS in the tech community. This built-in Windows feature is heavily documented by technology authorities for improving overall graphics scheduling in standard flat-screen games.
For normal desktop gaming, this feature usually works perfectly well. However, virtual reality is a completely different beast. For many popular headsets, leaving HAGS turned on creates massive communication delays.
You might suddenly notice your hands lagging far behind your actual real-world movements. This happens because the headset software and Windows are aggressively fighting for control over your memory. Turning this feature off in your Windows Graphics Settings can instantly stabilize your frame pacing.
Next, let us talk about the invisible performance killer hiding in your room. I am referring to the actual physical temperature of your computer components. High-end gaming generates an extreme amount of heat very quickly.
If your processor or graphics card gets too hot, it immediately goes into survival mode. The computer will intentionally slow itself down to prevent catching on fire. According to hardware experts, managing your system's heat output is a fundamental part of maintaining optimal PC performance.
One minute you are enjoying a perfectly smooth game. The next minute, your frame rate cuts in half and the screen becomes a jerky mess. You might think it is a software bug, but your computer is just choking on hot air.
This is especially common for gamers who do not use full-sized desktop towers. If you play on a portable rig, learning how to diagnose and fix overheating issues in high-performance laptops is an absolute must. Proper cooling is just as important as having a fast processor.
Let us also look at how you manage your daily network connections. If you play multiplayer games, your network ping matters heavily.
While learning what a VPN is and how it protects your online privacy on public networks is excellent for general web browsing, it can ruin your game. You should always turn off your VPN while gaming to avoid unnecessary network latency and random disconnects.
The Clean Installation Method
We always hear that we need to keep our system software constantly updated. But simply installing new drivers over old ones creates a messy pile of conflicting files.
Imagine trying to paint a beautiful new picture over an old, wet painting. The colors will mix terribly, and the final result will look awful. This is exactly what happens inside your system registry.
To fix deep-rooted stutters, you need to wipe the slate completely clean. Professional gamers use safe removal tools to entirely delete every trace of their old graphics software.
By performing a completely fresh installation of your graphics drivers, you permanently remove hidden corrupted files. Many users report that this single step entirely cured their unexplained performance drops.
Power Management Secrets
Another hidden secret lies entirely inside your Windows Power Options menu. By default, your computer is set to a "Balanced" power plan to save electricity. This plan allows your system to put your USB ports to sleep randomly.
When Windows tries to save power on the specific USB port holding your headset cable, disaster strikes. Your headset loses critical tracking data for a tiny microsecond. This translates into a massive, nauseating visual stutter right before your eyes.
You must go into your control panel and manually select the High Performance power plan. Next, disable the "USB Selective Suspend" feature in the advanced settings menu. This guarantees your headset always receives a constant, uninterrupted flow of electricity.
If these visual frame drops persist, the physical discomfort will catch up with you very quickly. No one wants to feel sick and dizzy after a fun gaming session. If you are struggling with dizziness, you should read up on how to stop VR motion sickness and enjoy gaming longer.
Sabotaging Your Own Setup: Common Troubleshooting Pitfalls
Let us shift our focus to the bad habits that ruin performance daily. In the desperate search for smooth gameplay, many gamers accidentally make their situation much worse.
I have seen countless people completely break their game files because they followed bad internet advice. Troubleshooting requires logical patience, not random mouse clicking. Let us explore the biggest traps you need to avoid right now.
The "Magic Software" Trap
Many shady websites heavily promote "game booster" software to desperate players. They promise to magically double your frame rate by cleaning your system memory.
Security and tech professionals often recommend avoiding third-party game boosters because they consume the very resources they claim to free up. Windows already does a fantastic job of managing its own memory. Adding a third-party booster just creates massive system confusion and background lag.
Over-tweaking the Debug Tools
Advanced users love to play with backend developer settings in their headset software. They see a random tutorial online and instantly change their encode bitrates and rendering resolutions.
Setting these numbers too high will instantly crash your graphics card. If you set your encode bitrate to a massive number, your hardware simply cannot process the heavy data fast enough. You will immediately experience terrible audio popping and heavy visual freezing.
Relying on Cheap Hardware Adapters
You should never daisy-chain your digital connections. I constantly see players plugging their headset into a generic USB hub, which is then plugged into an extension cable.
Every single adapter you add creates severe data loss and input lag. Data needs a clean, direct path straight to your motherboard. Generic USB hubs share limited bandwidth across multiple connected devices.
If your gaming mouse and headset share the same cheap hub, your headset will never get the speed it requires. If you absolutely must use an extension, ensure it is an active repeater cable that boosts the signal.
Ignoring Routine Battery Maintenance
For those playing wirelessly, failing to care for your headset battery is a massive mistake. Playing while completely draining the battery to zero damages the internal cells over time.
When a battery degrades, it struggles to supply consistent voltage to the processor during heavy games. Following proven charging habits for your headset is similar to learning how to stop ruining your laptop battery with proven steps for maximum life. Treat your wireless headset battery with respect.
Forgetting About the Physical World
Do not ignore your actual physical room environment. The cameras on the front of your headset need to see the room to track your body movements.
If your room is too dark, or your walls are completely blank, the cameras will panic. When the headset loses its position in the room, the entire virtual world freezes and shakes violently.
It feels exactly like a computer performance lag, but it is just a simple tracking failure. Always play in a well-lit room with visible features like posters or furniture on your walls.
Ready to Reclaim Your Virtual World?
Overcoming bad performance does not have to be a miserable or lonely experience. You now hold the exact knowledge needed to turn your choppy games into buttery-smooth adventures.
Think of your gaming computer as a high-performance sports car. It needs the right digital fuel, clear communication roads, and proper maintenance to hit top speeds. You have just learned exactly how to be the perfect mechanic for your setup.
Every time you eliminate a background conflict or optimize a USB connection, you take a massive step forward. The virtual worlds you love are waiting for you to experience them exactly as the developers intended. No more dizziness, no more frustration, and no more holding back.
Your Action Plan for Today:
Do not try to fix everything all at once. That will only leave you feeling overwhelmed and confused. Instead, tackle this simple checklist one logical step at a time.
- First, open your performance monitor and find out if your processor or graphics card is failing. This gives you a clear target to attack.
- Second, manually lock your render resolution at exactly 100%. Stop letting the software secretly inflate your graphics requirements behind your back.
- Third, physically check your connections. Move that cable to a high-speed motherboard port and ensure it sits tightly.
- Finally, dive into your Windows settings. Turn off GPU scheduling if it causes issues, and switch your power plan to high performance immediately.
You have invested good money into your gaming hobby. You absolutely deserve to enjoy it without technical headaches getting in the way. By treating your system with care and logic, you will unlock a flawless, truly immersive experience.
Put your headset back on your head with absolute confidence. The lag is gone, the stutter is defeated, and your digital adventures are finally ready to begin. Have fun out there, and enjoy the smooth gameplay you have rightly earned.
Trust me, you do not need to be a tech genius or spend tons of cash to enjoy smooth VR gaming. Take a deep breath, pick just one simple step from this guide, and try it out today. You are only a few quick tweaks away from the seamless virtual world you truly deserve!
Disclaimer: The troubleshooting steps provided in this article are for informational and educational purposes only. Changing system settings, power plans, or graphics drivers carries standard software risks. Please make sure to back up your important files before making major adjustments to your computer setup.