The Hidden Frustration of a Cramped Laptop Screen
We have all been there at some point during a busy workday. You are sitting at your desk, squinting at a tiny 13-inch or 15-inch laptop screen, desperately trying to juggle a dozen different tasks.
You open a spreadsheet, but then you need to check an email, so you minimize the first window. Then, a message pops up on your team chat, forcing you to switch tabs yet again.
Before you know it, your desktop is a chaotic mess of overlapping windows. This constant clicking, minimizing, and dragging completely destroys your focus and drains your energy long before the day is over.
A couple of years ago, I was stuck working on a tiny 13-inch laptop screen, constantly minimizing windows while trying to finish a simple project. I remember getting terrible neck strain and losing track of important emails every single afternoon. It was so exhausting that I almost hated starting my work day until I finally figured out how to set up extra screens properly.
Why Finding a Simple Solution Feels Impossible
Even when you finally decide to buy extra screens, the real nightmare begins. The technology industry makes it incredibly confusing for regular people to understand how to link everything together.
- Confusing tech jargon: You look up solutions online and get bombarded with terms like Thunderbolt, DisplayPort, and refresh rates.
- Wasting money on wrong cables: Many people buy basic HDMI splitters, only to find out they just duplicate the same image instead of extending it.
- Contradictory advice: Tech forums often give conflicting answers, making you feel completely lost and overwhelmed.
- Incompatible hardware: You might buy a nice screen, but your computer simply lacks the right physical connections to plug it in.
The Heavy Toll on Your Peace of Mind
This is not just a technology problem; it directly affects your mental well-being and daily confidence. Working on a limited display creates unseen stress that builds up hour after hour.
- Loss of productivity: You waste precious hours every week just switching between tabs and hunting for lost documents.
- Physical discomfort: Constantly hunching over a single small device leads to severe neck pain and eye strain.
- Imposter syndrome: When you see colleagues with highly organized, professional setups, you might feel less capable or poorly equipped.
- Meeting anxiety: During important video calls, you struggle to see the presentation, your notes, and the camera all at once.
The Ultimate Blueprint for a Multi-Display Workspace
Building a workspace with two, three, or even four screens might seem like magic at first. However, it is actually a very logical process once you understand the basic rules.
Think of your computer as a powerful engine. The screens are simply the windows that show you what the engine is doing.
To get that visual information from the engine to the windows, you need the right pipes. In this guide, I will walk you through exactly how to set up those visual pipes safely, properly, and easily.
Step 1: Identifying Your True Hardware Capabilities
Before you buy a single cable or adapter, you must investigate what your machine can actually handle. Every computer has a built-in graphics processing unit, often called a GPU.
This GPU has a strict limit on how many pixels it can push out at one time. If you try to force too many pixels through a weak GPU, your screens will remain completely black.
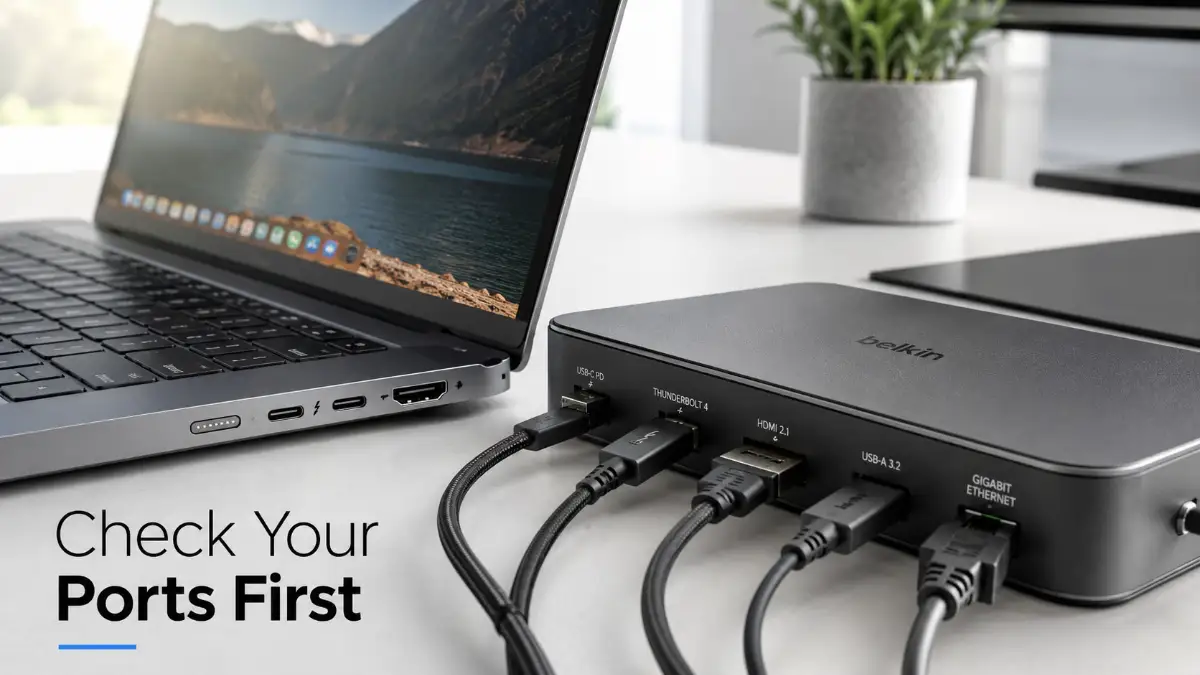
You need to carefully examine the sides and back of your machine. Look closely at the shapes of the ports you have available.
Understanding the HDMI Port
The most common connection you will find is the HDMI port. It is shaped like a small rectangle with the bottom corners chopped off.
Most modern laptops have at least one of these. You can easily connect one extra screen directly into this port using a standard HDMI cable.
However, standard HDMI ports usually only support one screen. You cannot simply plug a "splitter" into an HDMI port and expect to get two different, extended desktops.
The Power of USB-C and Thunderbolt
Next, look for small, oval-shaped ports. These are known as USB-C ports, and they are the secret weapon for massive workspaces.
But there is a catch that traps many beginners. Not all USB-C ports can send out video signals.
Some are only built for charging the battery or transferring files from a flash drive. You need to look for a tiny symbol next to the port.
If you see a small lightning bolt, that means it is a Thunderbolt port. Thunderbolt is incredibly powerful and can easily handle two or even three 4K displays at the same time.
If you see a small "D" shaped logo (which stands for DisplayPort), that port can also send video. If there is no symbol at all, you might need to check your manufacturer's manual online to verify its capabilities.
Step 2: Choosing the Right Hub, Dock, or Adapter
Once you know what ports you have, you need a bridge to connect your machine to the new displays. This is where most people make costly mistakes.
If your machine only has one HDMI port, but you want to connect two screens, you cannot use a simple $10 splitter. A cheap splitter will only give you a mirrored image, meaning both new screens will show the exact same thing.
To get distinct, separate desktops, you need a proper docking station or a Multi-Stream Transport (MST) hub.
Here is a quick tip from someone who learned the hard way: I once wasted money on a cheap HDMI splitter, thinking it would magically give me two separate screens. It ended up just showing the exact same image twice! Save your hard-earned cash and always double-check if your laptop needs a proper docking station or a DisplayLink adapter instead.
The Magic of Docking Stations
A docking station is a small rectangular box that sits on your desk. You plug one single USB-C or Thunderbolt cable from your machine into the dock.
The dock then acts as a massive expansion unit. It will have multiple HDMI or DisplayPort connections on its back.
You plug your new screens directly into the dock. The dock takes the heavy data stream from your computer, splits it up intelligently, and sends the right pictures to the right screens.
Solving the Apple MacBook Problem
If you are using an Apple MacBook, especially the base models with M1, M2, or M3 chips, you face a unique hurdle. Apple software naturally restricts these specific machines to only one external screen natively.
Even if you buy an expensive Thunderbolt dock, the second screen might simply mirror the first one. But do not worry, there is a brilliant workaround for this.
You need to buy a specific type of dock that uses DisplayLink technology. DisplayLink is a special software and hardware combination.
Instead of relying solely on your computer's native graphics card, a DisplayLink dock creates virtual graphics cards. You install a safe, free driver on your machine.
This driver compresses the video data, sends it through a standard USB port, and the dock uncompresses it. This allows you to easily bypass the restriction and connect two, three, or four screens to almost any machine.
Step 3: Configuring the Operating System for Seamless Flow
Getting the hardware plugged in is only half the battle. Once everything is connected and powered on, your screens might look weird.
They might be in the wrong order, or the text might look far too small. You have to tell your operating system exactly how your physical desk is arranged.
If you skip this step, moving your mouse will feel incredibly frustrating. You might move your mouse to the left edge of your main screen, but the cursor pops out on the right side of your second screen.
Mastering the Display Settings Menu
If you prefer watching a visual step-by-step guide on how to arrange your displays and fix scaling issues in real-time, check out this quick video below! Once you watch it, keep reading to learn the best expert tricks to protect your computer from overheating.
To fix this on a Windows machine, simply right-click anywhere on your empty desktop background. Select Display settings from the drop-down menu. You will see a visual representation of your screens, usually numbered 1, 2, and 3. You can literally click and drag these numbered boxes to match how they sit on your physical desk.
If screen number 2 is on your left, drag box number 2 to the left of box number 1. You can even drag them up or down if one screen is sitting on a higher stand.
Fixing Resolution and Scaling Issues
Sometimes, one screen will look perfectly crisp, while the other looks blurry or the icons are massive. This happens when your screens have different resolutions.
For example, you might have a high-definition 4K screen next to an older 1080p screen. You need to adjust the scaling settings to make them match comfortably. In the same settings menu, look for a section called Scale and layout. Windows might set your 4K screen to 150% scale, while the older screen sits at 100%.
Play around with these percentage numbers until a web page looks roughly the same size when you drag it across both screens. For Mac users, the process is very similar. Open your System Settings and navigate to the Displays menu.
You will see an Arrange button. Click it, and you can drag your screens around just like rearranging furniture in a room.
Understanding the Refresh Rate
There is one more technical detail that affects how smooth your experience feels. This is called the refresh rate, measured in Hertz (Hz). It simply means how many times per second the screen updates the picture. A standard office monitor runs at 60Hz.
If you bought a fancy gaming monitor that runs at 144Hz, it might look choppy when connected through a cheap dock. This is because older docks do not have the bandwidth to support high refresh rates.
Always check your advanced display settings to ensure your screens are running at their highest possible refresh rate. This will make scrolling through long documents and moving your mouse feel buttery smooth, significantly reducing eye fatigue during long work sessions.
Setting up your workspace correctly is an ongoing process. To really maximize your daily efficiency, we need to look beyond simply plugging in cables.
If you use a Windows machine, you can check the official Microsoft guide on setting up dual monitors to verify your software is completely up-to-date. This ensures your computer recognizes new hardware instantly without annoying driver crashes.
For Apple users, the hardware limits can be a bit tricky depending on the specific processor inside your machine. I highly recommend reviewing the Apple support documentation for external displays before buying expensive hardware to ensure compatibility.
When you have the right foundational knowledge, you avoid buying useless adapters that end up sitting in your desk drawer. A truly professional workspace should feel completely invisible and seamless while you work. Think of your displays like the dashboard of an airplane. You want all the necessary dials right in front of you so you can fly smoothly without searching for hidden information.
Let us look at some expert strategies to keep this multi-monitor setup running perfectly over the long run.
Expanding Your Digital Horizons: Expert Setup Strategies
The Magic of Daisy Chaining Your Screens
Most people assume that every single screen must have its own cable running all the way back to the computer. This creates a massive spaghetti mess of wires on your desk.
Instead, you can use a brilliant method called daisy chaining if your hardware supports it. This is exactly like a train, where the main engine pulls the first car, and the first car pulls the second car.
You run one single cable from your machine to the first monitor. Then, you plug a second cable from the first monitor directly into the back of the second monitor.
This keeps your desk incredibly neat and frees up valuable ports on your main device. Just make sure your specific screens support DisplayPort Multi-Stream Transport (MST) or Thunderbolt linking before trying this trick.
Defending Your Machine Against Heat Damage
Pushing millions of extra pixels across three different screens puts a massive workload on your graphics chip. Your internal fans will likely spin much faster, and the bottom of your device will get surprisingly hot.
If you ignore this heat, your system will automatically slow down to protect itself, causing your mouse to stutter and lag. This is why you must elevate the base of your computer using a cooling pad or an aluminum stand to allow proper airflow.
Good airflow is strictly non-negotiable when running heavy visual tasks all day. If your machine is constantly running hot and randomly shutting down, you should learn how to safely diagnose and fix overheating issues in high-performance laptops to protect your expensive hardware.
Keeping your system cool directly extends its lifespan. You will also enjoy a perfectly silent workspace without fans screaming in the background during your important voice calls.
Software Tools for Lightning-Fast Navigation
Having three physical screens is completely useless if you still drag windows around manually with your mouse. True experts use software shortcuts to instantly snap applications exactly where they belong.
On a Windows system, the built-in PowerToys application offers a powerful feature called FancyZones. You can literally draw custom, invisible grids on your screens.
When you hold a specific shortcut key, your open windows will automatically snap into these perfect grids like puzzle pieces. Mac users can achieve the exact same magic using inexpensive third-party tools like Magnet or Rectangle.
If you are working on demanding visual projects, like when you try to generate high-quality conceptual art using AI, this organization is a massive lifesaver. You can keep your generation tools on the left, your reference images in the middle, and your final edits on the right without ever minimizing a single window.

Costly Mistakes That Will Ruin Your Multi-Screen Experience
Many people rush onto online stores and buy the first cable they see, leading to massive frustration. Let me walk you through the most common traps so you can keep your money safe and your desk stress-free.
1. Buying a Cheap USB Hub Instead of a True Dock
This is the single biggest trap in the technology world today. A standard, cheap USB-C hub is only designed for keyboards, mice, and maybe a basic flash drive.
If you try to plug two large HD displays into a basic hub, your screens will constantly flicker and randomly go black. You need a dedicated docking station with a powerful internal processing chip to handle heavy video signals properly.
Yes, a proper dock costs more upfront. However, it will save you days of troubleshooting and returning broken products to the electronics store.
2. Ignoring Power Delivery (PD) Specifications
When you connect everything, you want one single cable to handle your video, data, and power supply. This incredible feature is known as Power Delivery or PD passthrough.
Many users accidentally buy a dock that only supports 60 watts of power delivery. If they are using a large, high-end 15-inch machine that requires 100 watts, the battery will actually drain slowly while plugged into the wall.
Always check the heavy power brick that came with your computer. Make sure the docking station you choose can match or exceed that specific wattage number perfectly.
3. Mismatching Refresh Rates and Color Profiles
Placing an older, washed-out screen right next to a brand-new, high-end display is a recipe for instant eye strain. Your eyes will constantly have to adjust to different colors, brightness levels, and movement speeds.
This visual mismatch is incredibly distracting, especially for creative professionals working from home. If you create digital content, having terrible visuals can ruin your workflow, much like how bad video editing is secretly killing your youtube money because the final output simply looks unprofessional to the audience.
Whenever possible, buy identical screens for your left and right side monitors. If that is not possible, spend a solid hour in your display settings manually tweaking the brightness and contrast so they match as closely as possible.
4. Falling for the HDMI Splitter Scam
As I mentioned earlier, we cannot stress this warning enough. An HDMI splitter takes one video picture and simply copies it to two different glass panels.
You will just have two screens showing the exact same spreadsheet or email inbox. Sellers online often label these splitters as "dual display adapters," which is highly misleading and technically false.
If you want two different, independent workspaces where you can drag items back and forth, you must use different ports on your computer or a proper dock. Do not waste your money on simple Y-splitters for professional office work.
5. Neglecting Desk Strength and Proper Ergonomics
Adding three heavy displays to a cheap particleboard desk is asking for a disaster. These soft desks will slowly bow in the middle under the extreme, constant weight.
Eventually, the desk can snap in half, destroying thousands of dollars worth of equipment in a single second. Invest in a solid wood top or a highly rated standing desk with a strong steel frame underneath.
Additionally, make sure the top edge of all your screens is exactly at your natural eye level. If you have to look down or tilt your head up constantly, you will develop severe neck issues within a few short months.
Think about how a pilot sits in an aircraft cockpit. Every important gauge is exactly where they can see it without straining their neck or twisting their spine uncomfortably.
You should mount your primary screen directly in the center of your vision. Your secondary screens should be angled inward, like a gentle curve, wrapping around your peripheral vision naturally.
If you place your screens entirely on metal monitor arms, you instantly win back all the desk space underneath them. This makes your desk look incredibly clean and gives you room to write in physical notebooks or place your coffee mug safely.
Building Your Dream Productivity Command Center
You now have all the expert knowledge needed to escape the limitations of a tiny single screen. The dark days of constantly minimizing tabs and losing important files behind other windows are finally over.
By taking the time to understand your hardware ports, you are already far ahead of the average computer user. You know exactly what to look for on the side of your machine, whether it is a powerful Thunderbolt symbol or a simple DisplayPort logo.
You also understand the massive difference between a cheap plastic hub and a high-quality docking station. This simple piece of knowledge alone will save you countless hours of frustration and wasted money on incompatible gear.
Take Action Today for a Better Workflow
Do not let this valuable information just sit in your mind without acting on it. Start by simply picking up your computer right now and looking closely at the connection ports available on the sides.
Make a quick note of what ports you actually have on your machine. Next, measure your physical desk with a tape measure to see exactly how much real estate you have available for new equipment.
You do not have to buy three massive screens all at once to feel productive. Start small by finding one highly rated, affordable monitor and a reliable docking station to begin building your ultimate setup safely.
The Immediate Benefits You Will Experience
Once you experience the freedom of having your email on one side, your main project in the middle, and your team chat on the right, you will never want to go back. Your daily tasks will suddenly feel much lighter and faster to complete.
Your neck will stop hurting because you are finally looking straight ahead instead of hunching down at your lap. Your confidence during online meetings will skyrocket because you can see everything you need without panicking or clicking the wrong buttons.
Just like professionals need to properly maintain their specialized tools, as explained in our guide to drone calibration tips to avoid costly repairs, you are simply calibrating your daily workspace for maximum performance. Treat your physical workspace with respect, and it will reward you with massive productivity gains every single day.
Remember to keep your cables tidy underneath the desk using simple velcro straps. Take breaks to rest your eyes, and enjoy the beautiful, expansive digital workspace you have just created for yourself.
Trust me, taking just one hour today to sort out your cables and screen settings will completely change how you feel about working. I went from feeling overwhelmed by a messy laptop screen to enjoying a clean, spacious workstation, and you can easily do the exact same thing right now!
Disclaimer: The information provided in this guide is for educational and informational purposes only. Hardware capabilities, port specifications, and software settings can vary depending on your specific laptop model, graphics processing unit, and display hardware. Always check your device manufacturer's official user manuals before purchasing extra accessories or connecting hardware.